
What’s new in Triaxes 3DMasterKit 9
While everyone was enjoying the summer, the work was humming in Triaxes laboratories. And now, please, welcome the new 9th version of 3DMasterKit with never-before-seen functionality!
- Automatic depth map generation for layers;
- Depth map editing in a third-party editor;
- Saving depth map to a file;
- Layer renaming;
- . psdd template file support, drag&drop support;
- Enhanced alignment marks generation function: the whole picture layout can fit the specified size;
- Page bleed for crop marks generation;
- Encoding for up to 400 LPI.
Let’s see in detail what we gain with this new functionality.
- Automatic depth map generation for layers;
The first significant innovation is that you can create depth maps for layered projects in just a few clicks. Image conversion to the 3D format has been significantly sped up. Let’s have a look at the following example.

We have a layered project without a depth map. Of course, we can use such a project as is (see below how it will look like).

Looks nice, but the layers are flat. It would be interesting to add some volume.
With new 3DMasterKit 9 we can easily do so. We right-click on the miniature of the layer (Layers panel) and choose “Generate depth map…” (Alt + D).
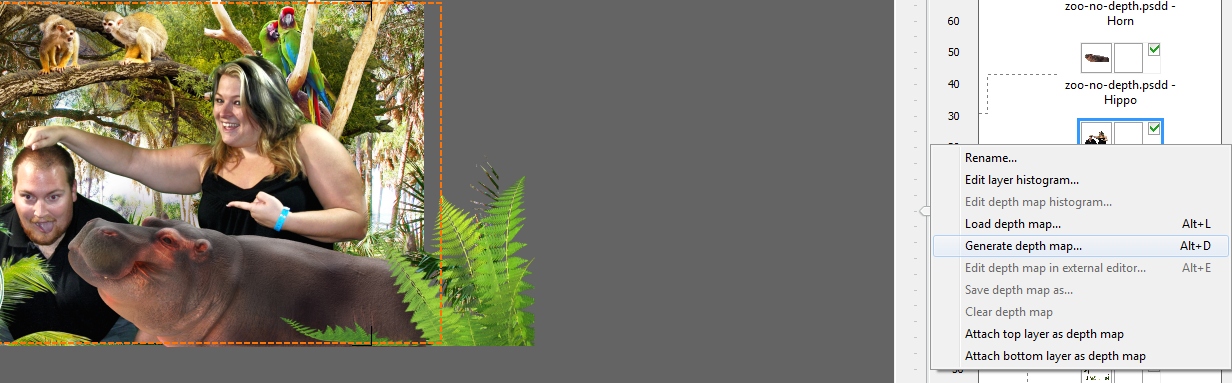
As a result we see a dialog where the software automatically offers a depth map variant for the layer. The user can change generation settings for getting the best result.

Let’s perform depth map generation for a number of layers and check out the result.

We see that layers have gained volume and now look more natural.
But what should we do if the depth map generated automatically is inaccurate?
In this case editing such a depth map in a third-party editor can be of great use.
- Depth map editing in a third-party editor
3DMasterKit 9 allows setting a third-party editor for depth map editing in the Settings dialog (Ctrl + K).

Moreover, if you choose Photoshop or GIMP, the software will export the depth map together with the image of the layer, which considerably simplifies the task for the user.
Let’s take the layer with a hippo as an example and see how it will be done.
We open the context menu of the layer and choose “Edit depth map in external editor…”.
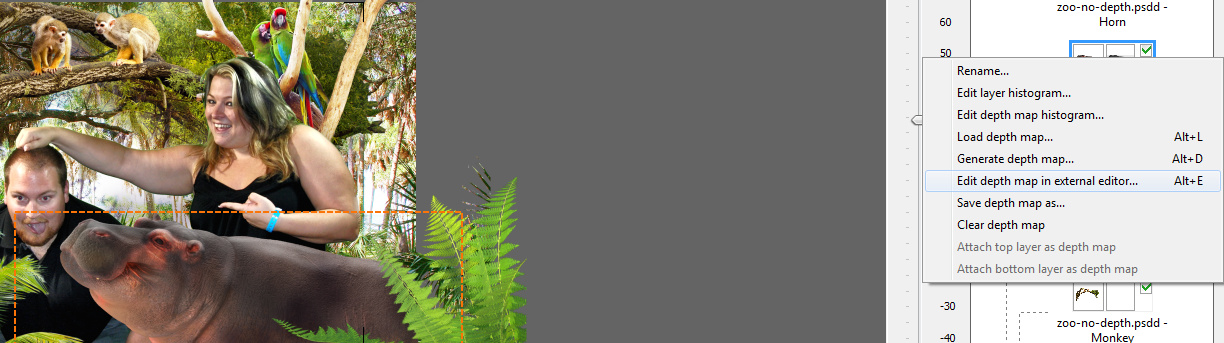
The image will be exported to the editor specified in the settings. In our example we use Photoshop.
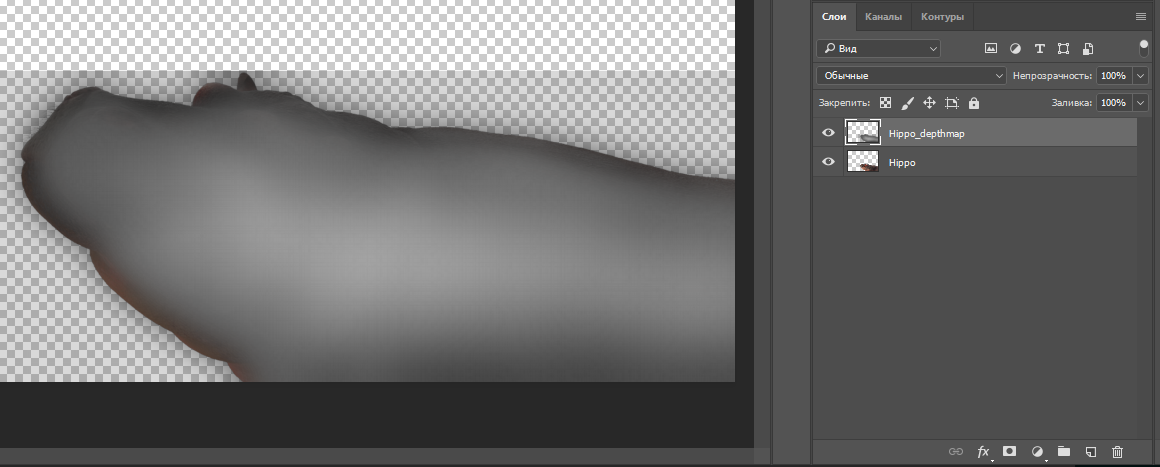
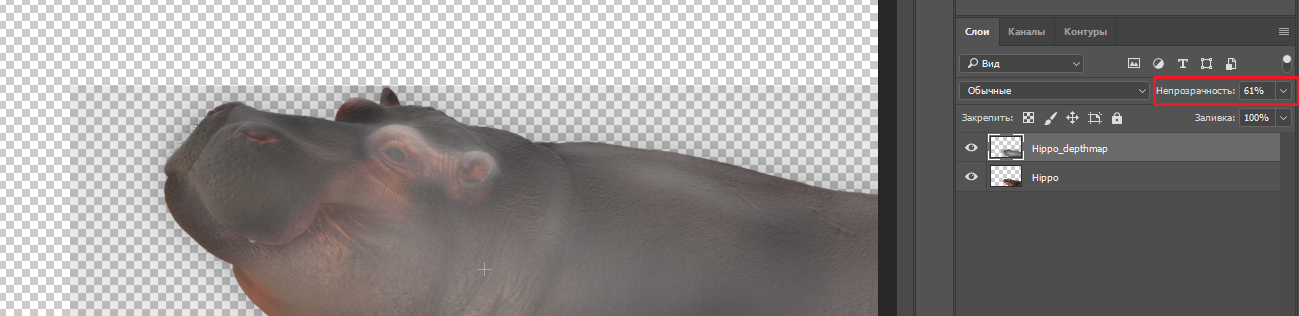
The image of the layer and its depth map are exported to the editor as 2 layers. Now we can edit the depth map. To see the image and modify the depth map according to the peculiarities of the source image we can change the transparency of layers and toggle their visibility.
After saving the layer and its depth map in the editor (Ctrl + S) the imge will be automatically updated in the 3DMasterKit project (if you flag the corresponding option in 3DMasterKit settings).
- Saving depth map to a file
The resulting depth map can be saved to a file by the corresponding command in the context menu of the layer (right-click on the miniature of the layer on the layers list).
- Layer renaming;
Now you can rename the layer. We recommend giving meaningful names to layers if it hasn’t been done before.
- . psdd template file support, drag&drop support;
.psdd file is actually an extended variant of the .psd format. Additional characteristics like interconnection of layers and their place in the template are shown in the Layers panel.
New editing functions make 3DMasterKit a handy tool for virtual scene (template) creation. Such virtual scenes are used in 3D photography and saved in the .psdd format.
When you click on a .psdd file in the Windows Explorer, it will be automatically opened in 3DMasterKit. You can also just drag&drop such files to the 3DMasterKit window in order to open them.
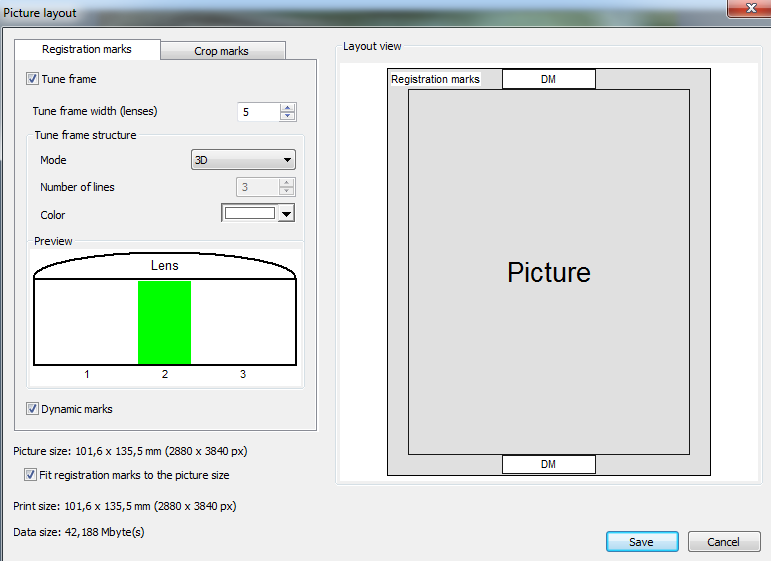
- Enhanced alignment marks generation function: the whole picture layout can fit the specified size;
In older 3DMasterKit versions the alignment marks were always added to the over-all size of the image, which was not convenient. If the user wanted the whole image to fit some certain size, additional calculations were required. Now the user can adjust the alignment marks to the specified size by only 1 click. To do that when setting parameters for the picture layout – flag “Fit registration marks to the picture size”.
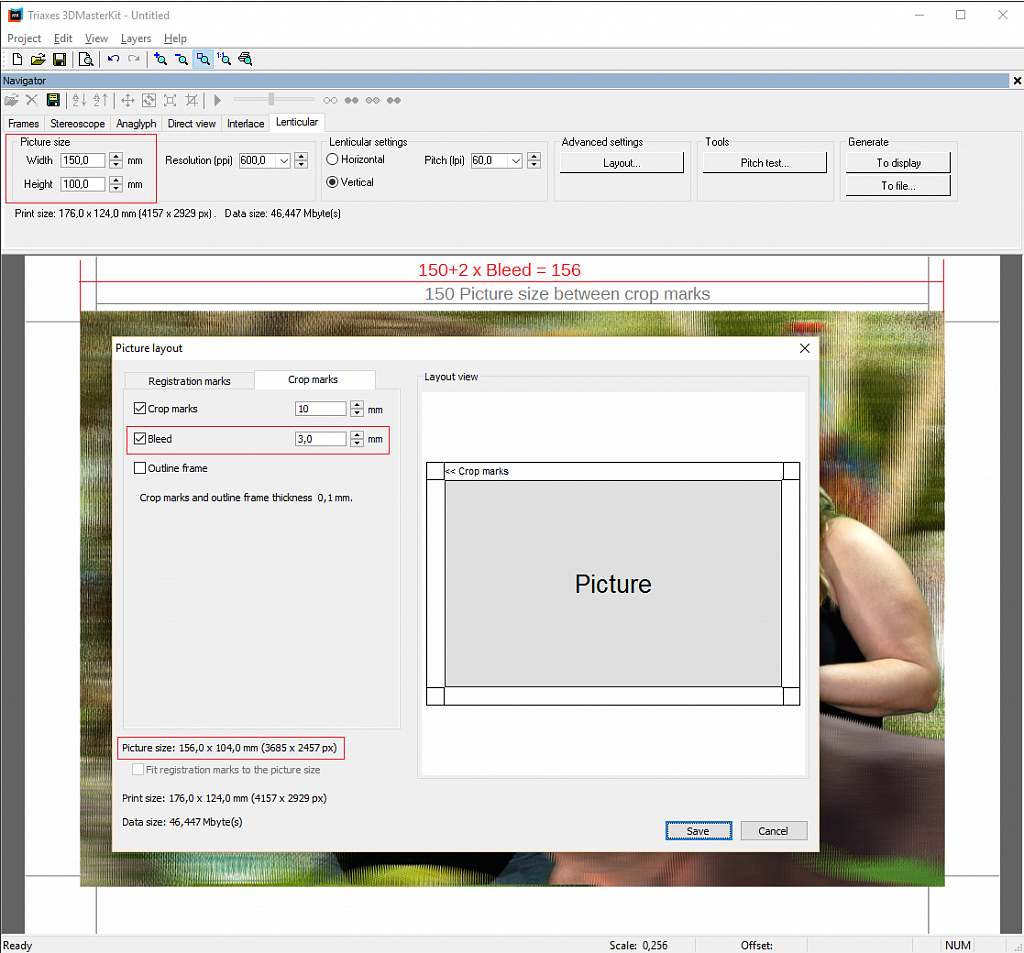
- Now it is possible to set the image page bleed when creating a picture layout of the encoded image.
Page bleed is a parameter indicating how far the image will stand proud of the expected cropping size. It can make sense to set the page bleed when cropping is not accurate and you want to prevent white edging. By setting the page bleed you extend the size of the encoded image by the specified value. In this case the crop marks are set according to the image size specified in the encoding parameters. When you change the image size, the aspect ratio remains unchanged. The size corresponding to lens orientation is taken as a basis. It means that the page bleed based on another value might differ from the set value.
- Encoding limits are extended
At the request of 3DMasterKit users we extended the value range of the encoding parameters. The pitch was extended to 400 LPI, the number of lenses of the alignment marks – to 50.


