What’s new in Triaxes 3DMasterKit 8
 Download the New Version from Product Page
A revolutionary-new version of 3DMasterKit that has been edgily waited for is coming out. Let’s enumerate new features in brief and then describe them in detail.
- The automatic mode of frame number calculation, when a multi-view frame series is generated, allows getting a better 3D effect;
- Picture layout: alignment marks with advanced settings, centering marks, crop marks;
- Alignment marks generation modes: 3D, Flip, Custom;
- Dynamic marks defining correct lens matching;
- Crop marks;
- Pitch-test generation into a PSB file;
- Play/Stop frame animation with Space-bar;
- Ability to lock the Crop Rect aspect ratio;
- Move instrument for the relative shift of the source frames;
- Changing measurement units. Working with inches;
- New on-line activation system. Now it is even easier to use the software.
1. Automatic frame number calculation when generating a frame series
The Multiview generation dialog got additional settings useful for working with layered projects. Now the user can either set the number (N) of generated frames or input the required print resolution and lens pitch: the software will calculate the optimal frame number. Automatic N calculation allows you to simplify the process and get the best quality of 3D images, i.e. object images will be more detailed and have greater parallaxes (foreground and background). Experienced users can still set the required N value.
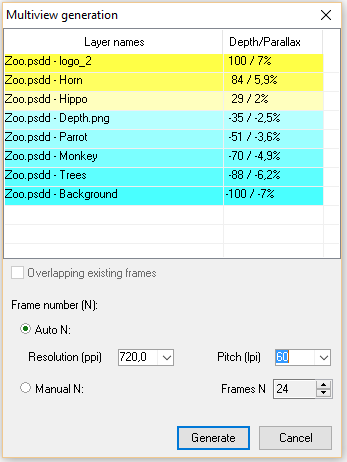
Also we preserved the mode that allows superimposing layers on the existing frame sequence. This mode is available if a series of source frames is already added to the project. Layers will be superimposed on the source frames with the preset parallax parameters.
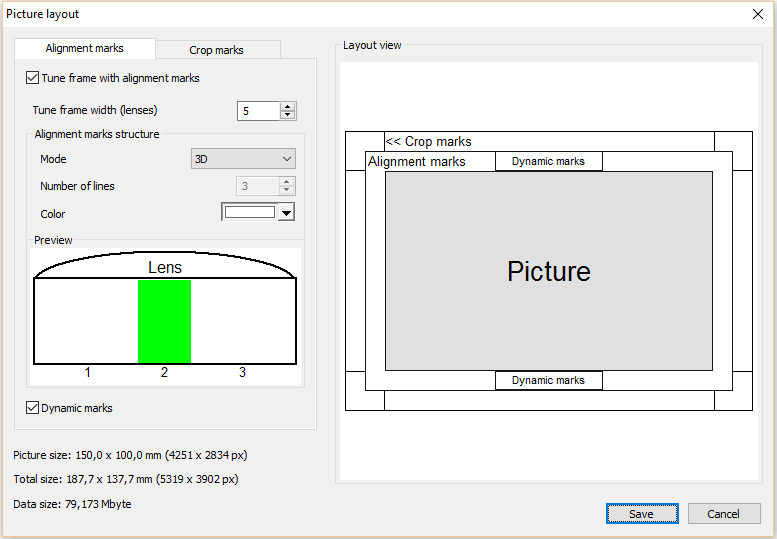
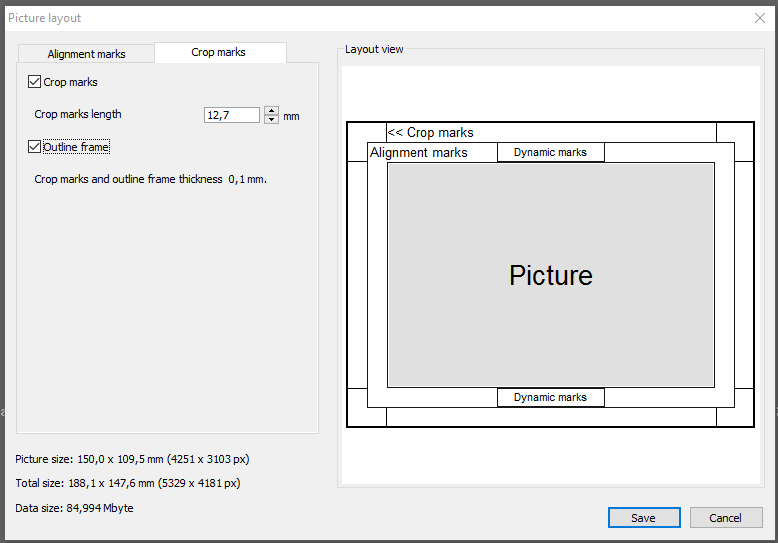
2. Picture layout
3DMasterKit 8 got the new Picture layout dialog. This dialog allows setting the parameters of the additional formatting elements that will be activated round the encoded image: alignment marks, dynamic marks, crop marks, outline frame.
To open the new dialog click Layout in the Lenticular tab.

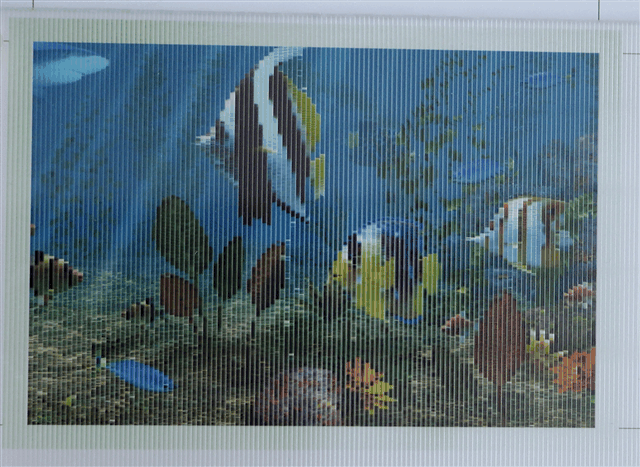
The alignment marks round the encoded image have existed in 3DMasterKit since the very first versions. They allow you to ensure you have selected the correct encoding pitch and lenticular lens are parallel to encoding stripes.
In the new 3DMasterKit we added several modes of alignment frame formation that considerably enhance its application methods. Now with the help of the alignment marks you can easily define the way you should bond the lenticular screen to the image. You can center the lenses precisely and make the required frame of the flip image to be viewed from a certain position.
3. Alignment marks generation modes: 3D, Flip, Custom.
The dialog includes several templates of alignment marks generation.
For 3D image encoding the “3D” structure of the alignment frame is used. In this case thin lines of the alignment frame are located at the center of the stripes constituting the encoded image.

When the lens position relative to the encoded image is correct (central position) the frame of the preset color will be clearly seen when viewing from the front.
When the viewpoint is inclined to the left or to the right the frame disappears.
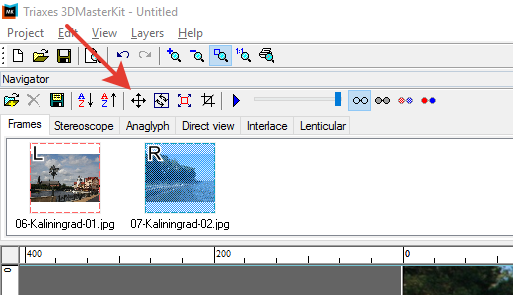
The second Flip template of the alignment frame creates lines of different colors enabling to define how to bond the lenticular screen to the encoded image.

In this example 2 source frame are encoded:

Image A: Kaliningrad-01.jpg |

Image B: Kaliningrad-02.jpg |
The lines of the alignment frame will be located at the center of the code stripe of each frame.

It allows matching the image with the lenticular screen so that a particular frame is demonstrated when being viewed from the front.
Also there is the manual mode of structure formation available. In this mode an experienced user can set the required type of lines for the alignment frame.

4. Dynamic marks defining correct lens matching
To set the lens position the Dynamic (centering) marks box is designed. By checking this element you can add a code area with special lines to the alignment frame as it is shown in the figure.
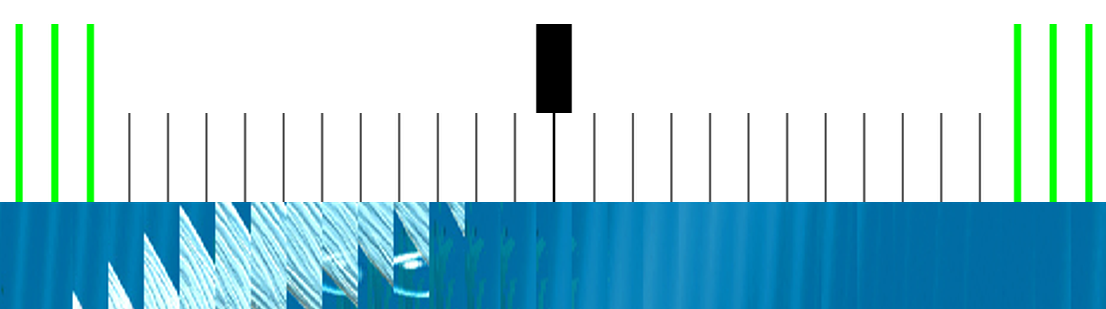
When being viewed through the lenticular screen at different angles a moving element will appear in the Dynamic marks box. Matching of two marks, moving and static, in the case of the perpendicular view direction corresponds to the correct lens position. Dynamic marks are formed on the top and on the bottom of the encoded image. They have to take the right position simultaneously as it is shown in the picture – it means the lens are parallel to the code stripes.
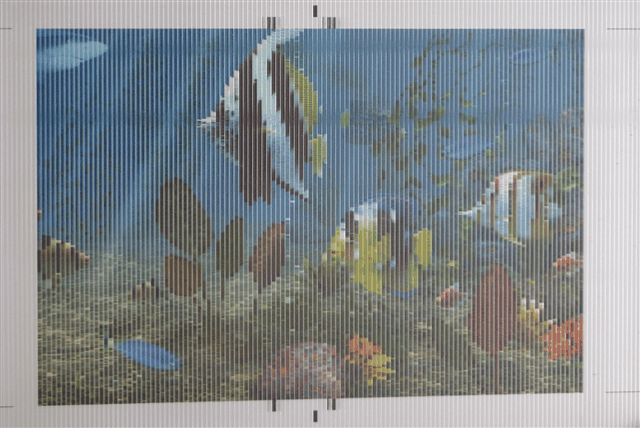
5. Crop marks
In the Crop marks tab in the Picture layout dialog there’s an option enabling to add crop marks to the image, as well as set their length and add an outline frame.
6. Pitch-test generation into a PSB file
The PSB format is used for storing big Photoshop documents with the image size of more than 30.000×30.000 pixels or the file size of more than 2Gb. This format is supported by 3DMasterKit for saving encoded images. By popular demand, in the 8 software version we added the function enabling to generate the pitch-test into a PSB file.
7. Play/Stop frame animation with Space-bar
To evaluate the expected effect there is the frame viewing mode enabling to show frames on the screen in turn (animation view). Now you can play and stop the animation with the Space-bar key.
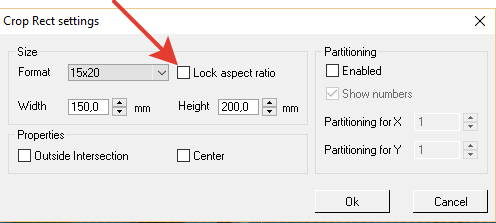
8. Locking the Crop Rectangle aspect ratio
Users of the early 3DMasterKit versions remember that it was possible to change the Crop rectangle proportions at will. Then this option was removed to enable the part-by-part image encoding. Now we have found the way to keep the ability to change the Crop rectangle aspect ratio at will. To do that uncheck Lock aspect ratio.
9. Move instrument for the relative shift of the source frames
Customarily the ability to relatively shift the frames (the moving mode) was enabled in 3DMasterKit on default. The user could drag the frame to the new position relative to the leftmost frame. It is convenient for quick frame alignment. However, sometimes accidental image move adds undesired project changes. That is why in the 8 version the new Move instrument is introduced. Now to move frames you must choose this mode. The cursor type in this case will be changed.
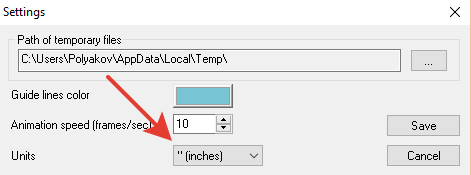
10. Changing measurement units. Working with inches
Now you can choose the measurement units in 3DMasterKit: mm or inches. To change the measurement units use the software Settings dialog (Project >> Settings).
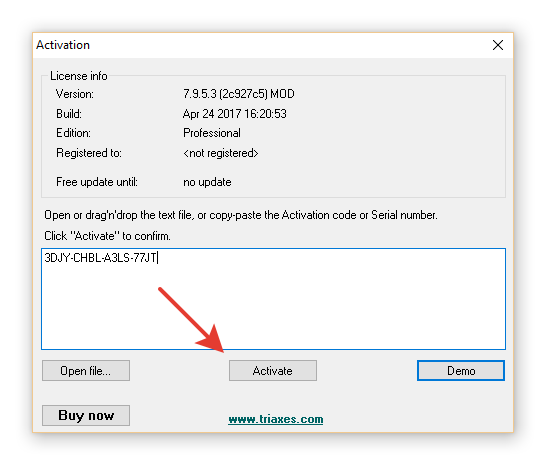
11. New on-line activation system. Now it is even easier to use the software
3DMasterKit ver. 8 uses the license server for software activation. To switch the software to the full-mode you must specify the Activation code and the software will address to the Triaxes server and will be activated.
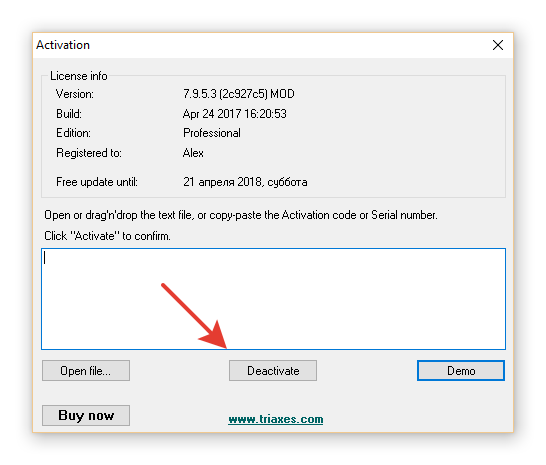
If you need to copy the software to another computer, you must deactivate the software by clicking Deactivation. Then you can install and activate the software on the new computer. Activation/Deactivation can be also performed on computers with no Internet connection. See the Activation user guide for more details.