
Direct UV lenticular printing
Triaxes Legend. Purpose and features.
Triaxes Legend (Lenticular Generator for Direct print) software is designed for printing lenticular images directly on the lens.
The software is based on 3DMasterKit, but it’s also supplemented with the features necessary for direct printing:
- Mirroring when encoding.
It’s necessary for printing on to the flip side of the lens. - Positioning frame generation for precise lens positioning on the printing table.
This feature allows to get proper lens positioning on the table. This is one of the key stages of the direct printing process. - Partitioning of big images and printing part by part.
An essential feature for printing images bigger than the printing format. Splitting into parts is done with the alignment on the edge of the lens. - Source frames transparency support, transparency transfer.
Transparency is often used for source frames design. The alpha channel (or transparency) is saved in the encoded image. It allows to encode lenticular images without the background as well and use them for more complex design work. - Support of different X-, Y-resolutions.
The more the resolution of an encoded image, the more the size. The size of data can be so big that images become difficult to work with. The horizontal resolution (athwart lens direction) impacts on the depth perception more than anything else. The possibility to set different resolutions allows to considerably decrease the data size by decreasing the vertical res when you deal with 3D.
Using UV plotters for lenticular image printing
Our experts tested direct image printing prepared in Triaxes Legend on Arizona OCE 360, Mimaki UJF-3042, Mimaki JFX-1615, Roland LEF-20 and SUN plotters. We made tests using 20 – 70 lpi lenses of different sizes: from A4 up to 120×60 cm.


One of the key moments of the direct printing process is the proper lens positioning on the printing table when lenticular image code strips match the lenses of the lenticular sheet. This is a mandatory requirement for producing an image of high quality.
Direct UV printing procedure
Let’s say we have already prepared a multiview frame series and are ready to start printing. Let’s consider the standard steps.
1. Pitch test.
The easiest way is to print a pitch test on paper or more preferably on white glossy film providing less ink spreading, which gives a more precise result, since the film is closer to the lenticular material in terms of its surface features unlike paper.
Then one should put a lens onto the printed pitch test and find the proper value. The pitch test is made with the estimated viewing distance taken into account, i.e. when the final 3D image is supposed to be viewed from the 1-meter distance then you make (look at) the pitch test from the same 1-meter distance. Read more here.
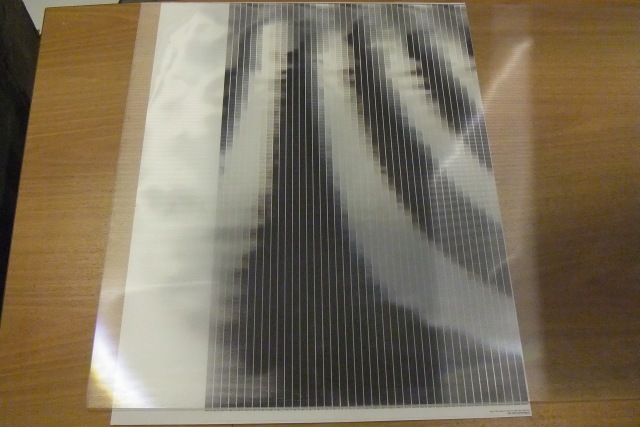
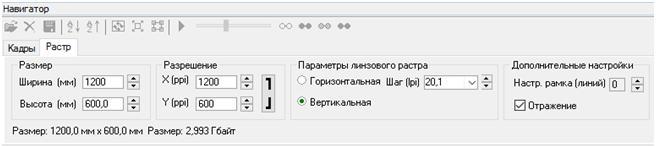
2. Now using the lens pitch (optical resolution) one can encode and print the positioning frame. It’s recommended to set the 1-px line width.
The pitch of the positioning frame should equal the pitch of the lens that has been found. The width of the positioning frame should equal the size of the future lenticular image. It is important for the positioning frame to have the central line as well as the left and the right boundary lines.
Note! When encoding a positioning frame it’s necessary to use the horizontal resolution of the plotter printing profile (or multiple values).
3. Then it’s necessary to encode the image. Use the «To file» option, because UV printers usually have their own printing software, which takes single files at the input. Don’t forget to check mark the Mirroring option, as the printing goes onto the back side of the lens.
Note! When encoding an image it’s necessary to use the horizontal and vertical resolution of the plotter printing profile (or multiple values).
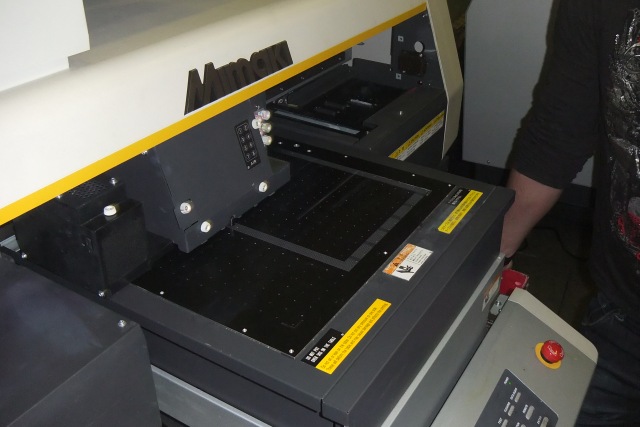
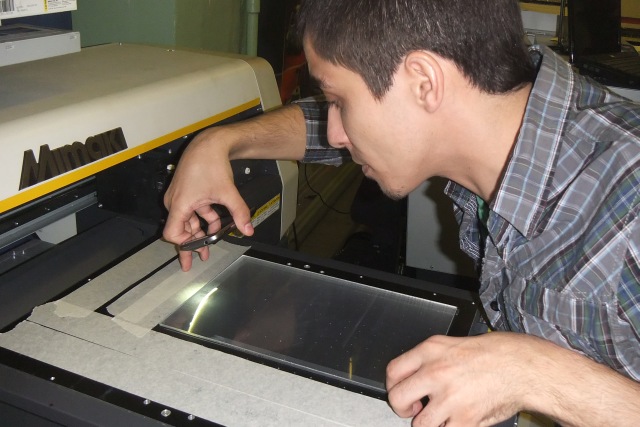
4. Then it’s necessary to position the lens on the printing table with lenses downside.
 It’s recommended to use a digital microscope to get more precise positioning.
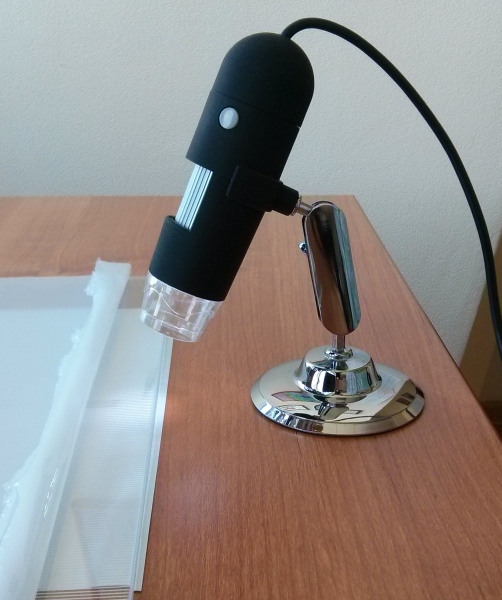 When the frame lines are between sheet lenses, one almost cannot see them — this is the right position.
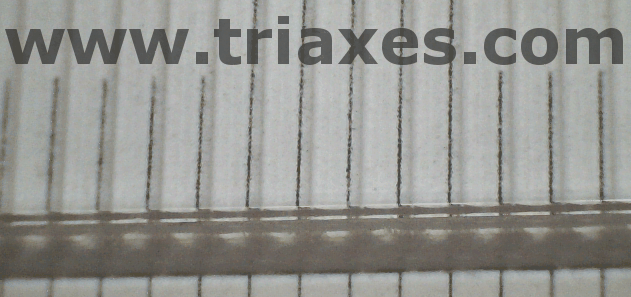
Note! The positioning goes using the central line of the positioning frame. It’s necessary to position the lens in the way the frame lines are between sheet lenses, equally along the whole length of the sheet — it ensures the frame lines are parallel to sheet lenses and results in precise matching. It’s necessary to fix the lens on the table after positioning. The vacuum hold-down is a perfect tool.
5. Now one can start printing. It’s necessary to send the file saved by Triaxes Legend to the UV plotter printing software.
Note! To match the encoded image with the lens it’s necessary to print the encoded image from the same starting printing point as in the case of the positioning frame.
To match the encoded image with the lens means the code stripes of the image are placed accurately under the lenticular sheet lenses. It allows to perceive the lenticular effects, such as: 3D, flip, animation, morphing, zoom, – without artifacts (doubling, show-through, shallow depth, bad switching). This is one of the keys to success.
6. After printing it’s necessary to close the back side of the image with the white film layer to avoid the show-through effect.
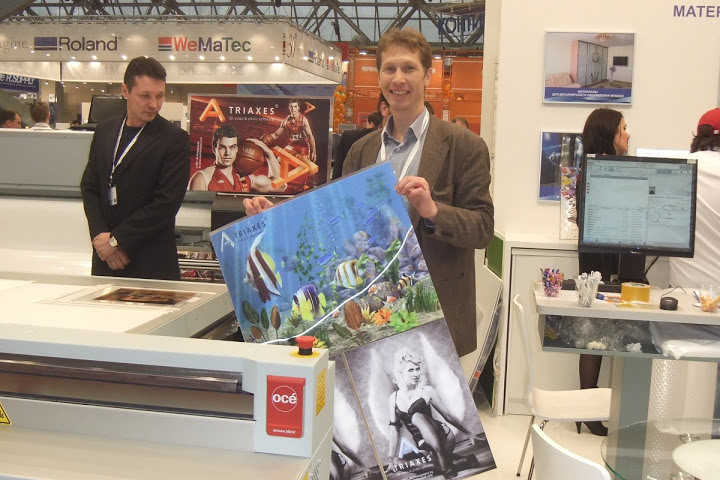
Samples of lenticular direct printing on UV plotters
Have a look at the samples of morphing and 3D frame series preparation for direct printing:
Morphing:

The frame series is prepared in Triaxes Morpher software, encoded by Triaxes Legend, printed by Mimaki UJF-3042.
3D:
 The frames series is prepared by photographer Martin Hausler, encoded by Triaxes Legend, printed by Mimaki UJF-3042.
Minimal configuration: Core i3 processor, 2Gb RAM, 100 Mb of free disk space to install the software and 1 Gb for temporary files on the HDD.
If you wish to create large images of high quality, 2 Gb of RAM allocated by 32-bit OS is not enough (even if you have more RAM, it’s of no use anyway).


