Manual depth map creation
One of the many methods for creating 3D images is based on using information about the distances to image objects (depth maps). If you have a source stereoscopic image (stereo pair of left and right frames), you can build a depth map in a special program, for example, in Triaxes StereoTracer. However, if you want to create a 3D image out of a flat 2D picture, you will have to draw the depth map manually (add depth information). For that you will need a graphics editor (Adobe Photoshop, GIMP or any other) and the following functions:
- lasso tool;
- layers;
- gradient tool.
Of course, you will have to practice using these tools, but it is not difficult at all.
1) Run the editor and open your picture. I use Adobe Photoshop in this example, but you can do the same using any other program, for example, GIMP, which is freeware (I will describe the process of manual depth map creation using GIMP in the next example). 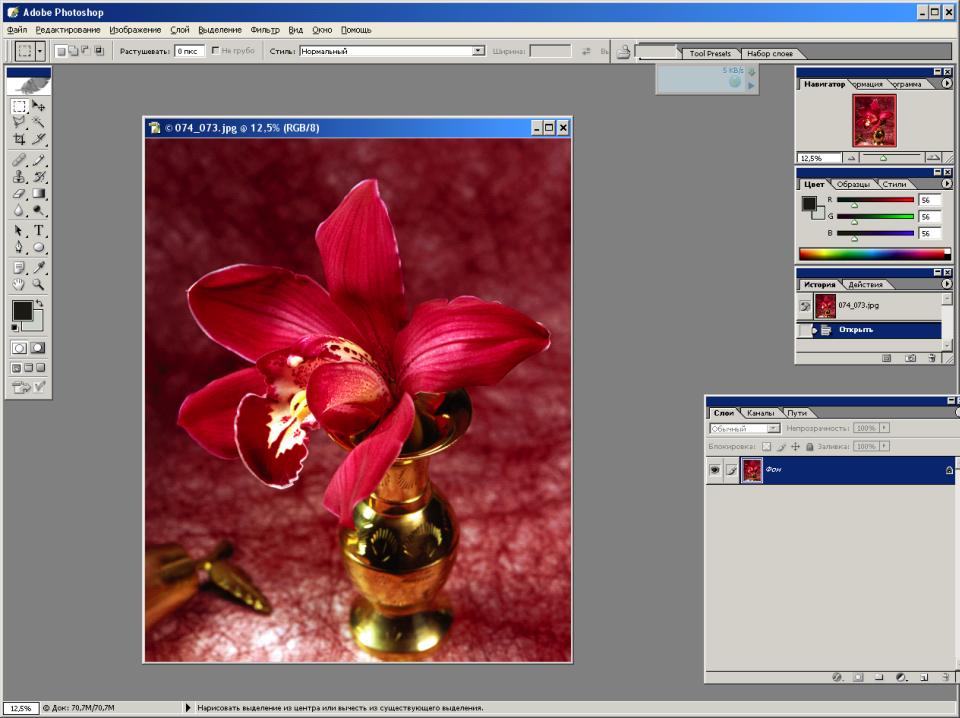
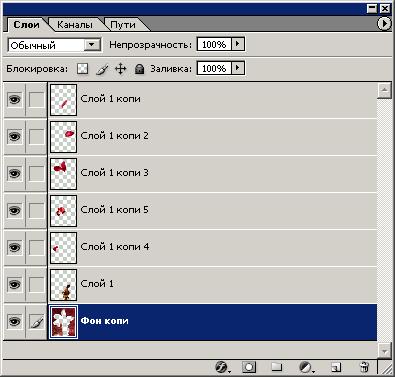
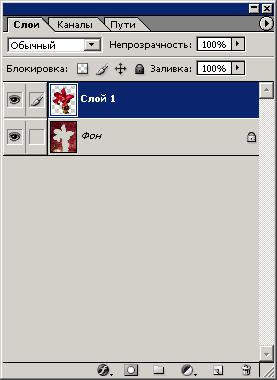
2) Select the whole image (Ctrl+A), then press Copy (Ctrl+C) and Paste (Ctrl+V). Now you have 2 identical layers in the Layers dialogue.
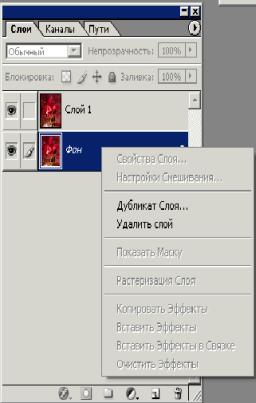
Click the right mouse button on the background layer and press Delete.
Now we have only 1 layer left. All these operations are needed to unlock the background layer.
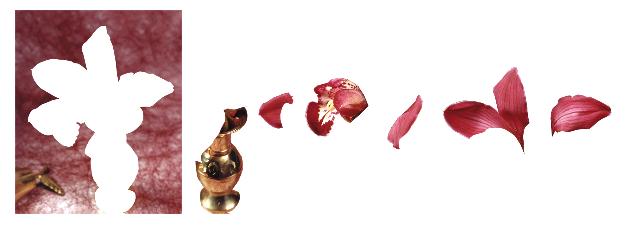
Now we segment the image for the further depth map creation. Th idea is to divide unequally distant objects into different layers, so that equally distant objects belong to 1 layer. For example, we can select 6-9 segments in this picture. The background belongs to the 1st layer, the vase – to the 2nd one, each petal belongs to its own layer. As a result, we get the following:
You will need the lasso tool for object selection. You can use either the usual lasso tool or polygonal lasso or magnetic lasso. It doesn’t really matter.
3) Segment the image in the following way: first of all, select the object that you want to put on a separate layer. Here I separate the vase with flowers from the background.
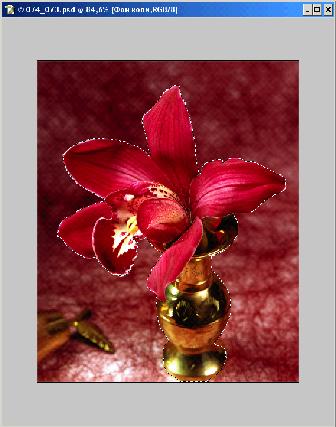
Press Copy (Ctrl+C), then Delete (del), then Paste (Ctrl+V). The vase with flowers is now separated from the background.
Separate all the other elements of the picture in the same way. As a result, we get the image split into segments.
4) Change the image mode into the grayscale mode. Image -> Mode -> Grayscale.
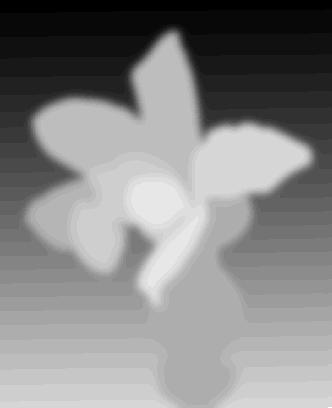
5) Now fill each layer with a flat colour. The fill colour will depend on the object distance. For example, the petal in the foreground is closer to the viewer than the vase. Consequently, the foreground petal should be lighter, close to the white colour. The vase should be darker – close to light-gray. The background should be almost black.
You can colour the layers in different ways:
1. Select a layer, press Image -> Adjustments-> Brightness/Contrast. Set the contrast to the minimum (-100), the brightness value will depend on the colour we want to get. +100 = light colour (white), -100 = dark colour (black).
2. Select a layer, select the Magic Wand tool, click somewhere beyond the object, select everything but for the object. Press Select Inverse (Shift+Ctrl+I). Then go to Edit –>Fill (Shift+F5) and choose the fill colour in the dialogue that will appear.
As a result, you will get something like this:
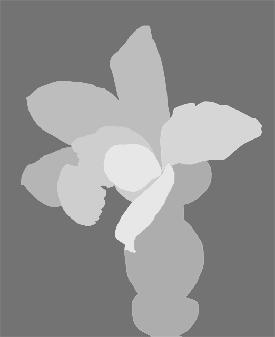
The closer the object, the lighter the fill colour.
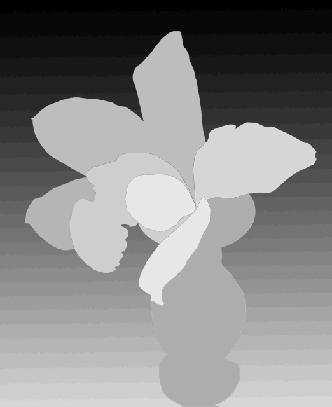
6) The background in this picture is not uniform. Different background areas are unequally distant from the viewer. The bottom part is closer, the top part is farther. That’s why in order to get better results we need to use the gradient tool to fill the background. Select the background and fill it with the top-down gradient:
7) Finally, we merge all the layers and blur the image:
1. To merge the layers go to: Layer -> Merge layers.
2. To blur the image go to – Filter -> Blur -> Gaussian Blur.
8) The depth map is ready.
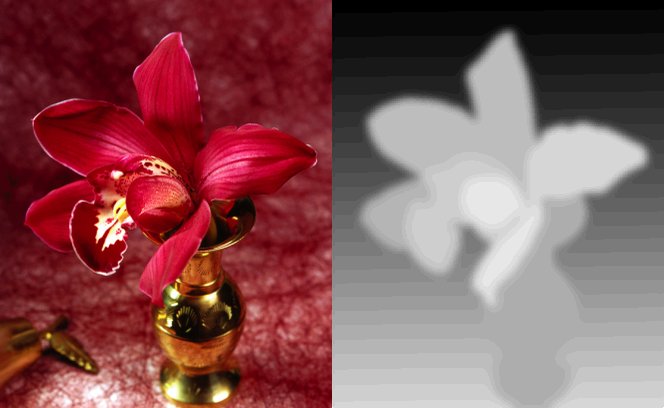
Now you can open the image and its depth map in StereoTracer and generate a series of frames.
Using this series you can create a lenticular 3D image with the help of 3DMasterKit.
Here’s the final stereo pair (the first and last frames of the series)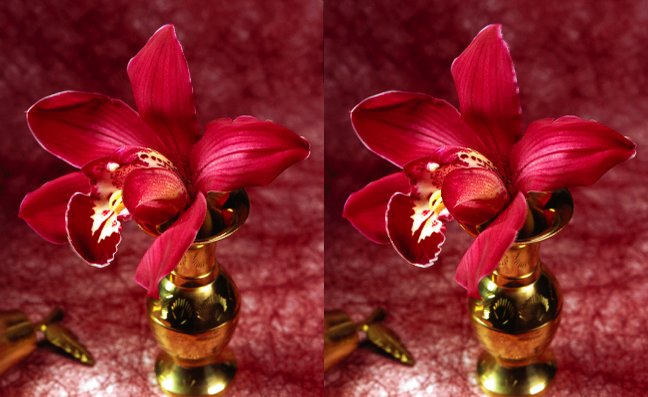
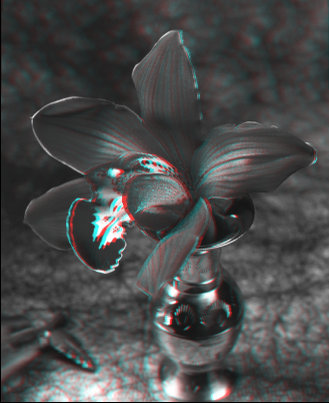
Anaglyph image:
Animated GIF image exported from 3DMasterKit.
Using GIMP for manual depth map creation
GIMP – is a free alternative to Photoshop. Moreover, the program is adapted to many languages. You can download the editor from http://www.gimp.org/
GIMP can be effectively used for depth map creation. There are handy tools enabling objects selection. Here’s an example.
I decided to take this image of a man selling hats as a source image. I took this pic some years ago in Nevada.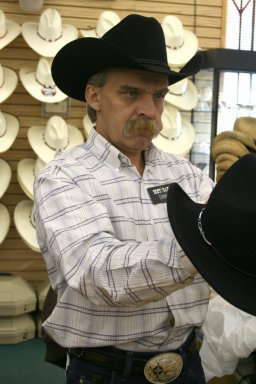
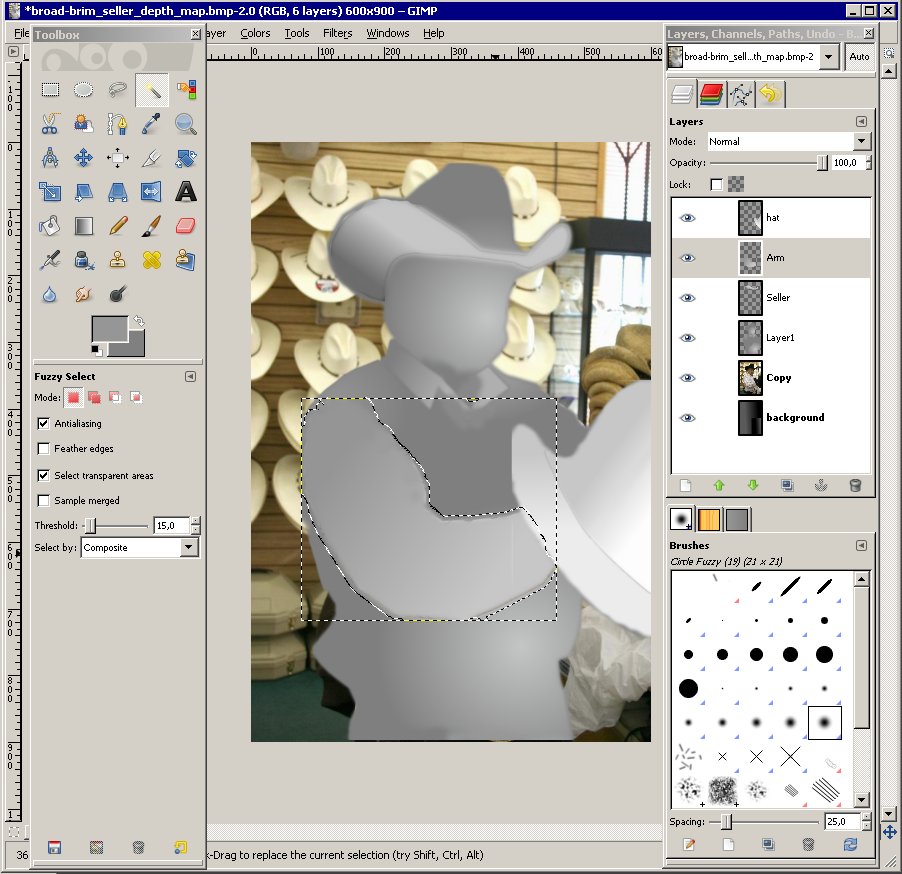
I open the picture in GIMP and split it into parts. Then I use the gradient tool to fill the layers.
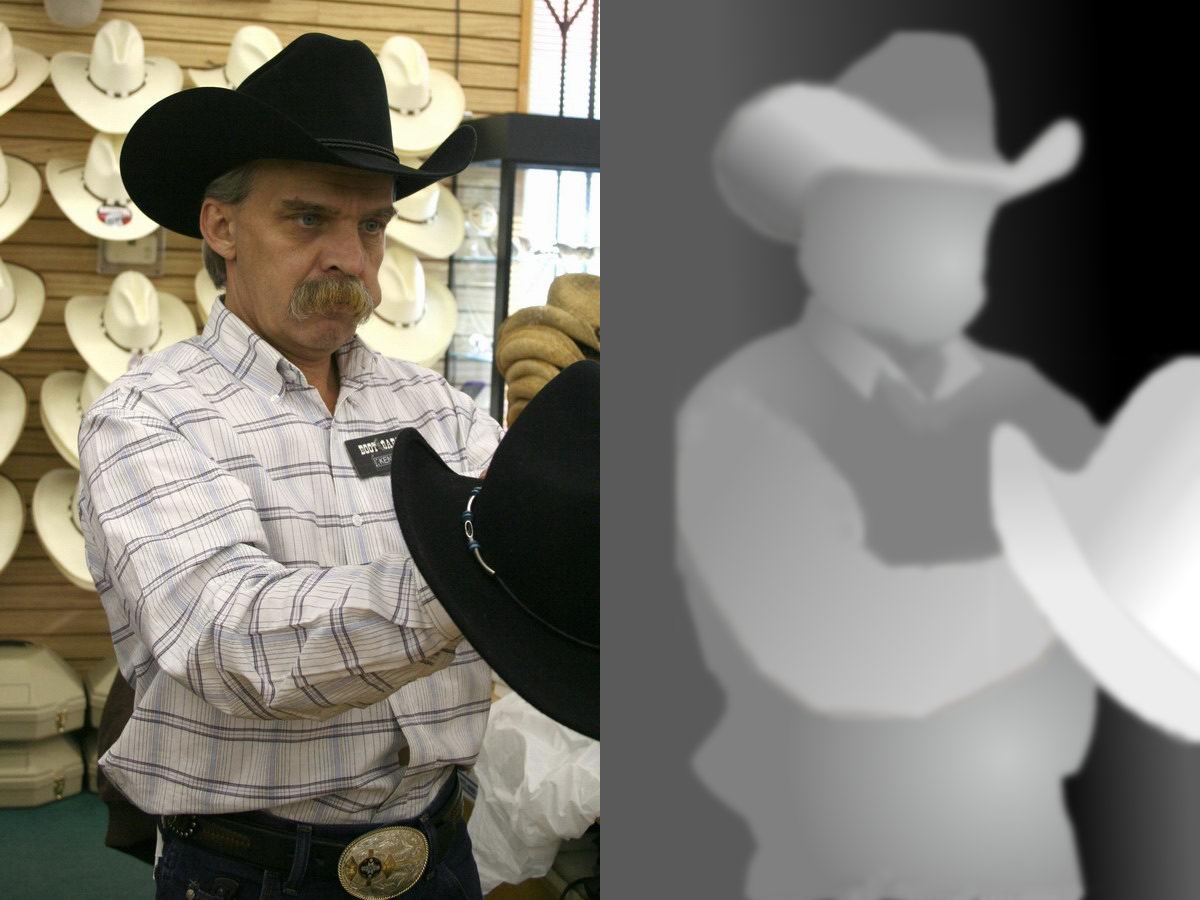
Then I use the “Flatten image” function (merge layers) and blur the image with the Gaussian filter to make the depth map “smoother”. As a result, I get the following:
Then we need to use Triaxes StereoTracer to generate a series of frames.
Here’s the resulting stereo pair (the first and last frames of the series):

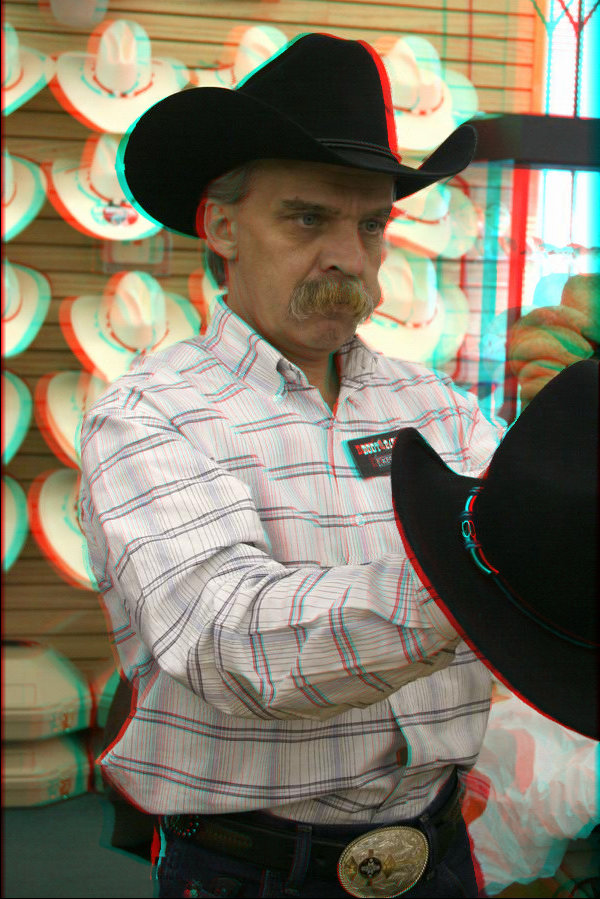
Anaglyph image:
Animated GIF exported from StereoTracer:

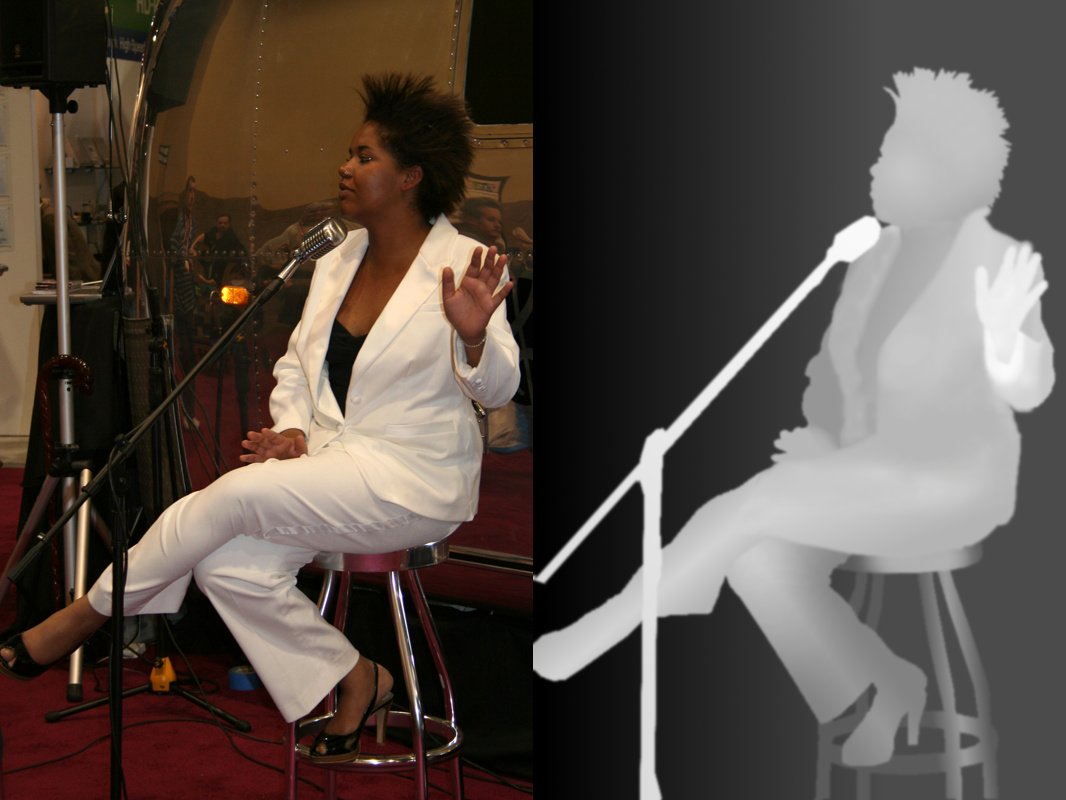
One more example of 2D to 3D image conversion
I used GIMP and the above-mentioned method to create a depth map for the next image.
Source image and depth map:
Stereo pair generated in StereoTracer:
Anaglyph image: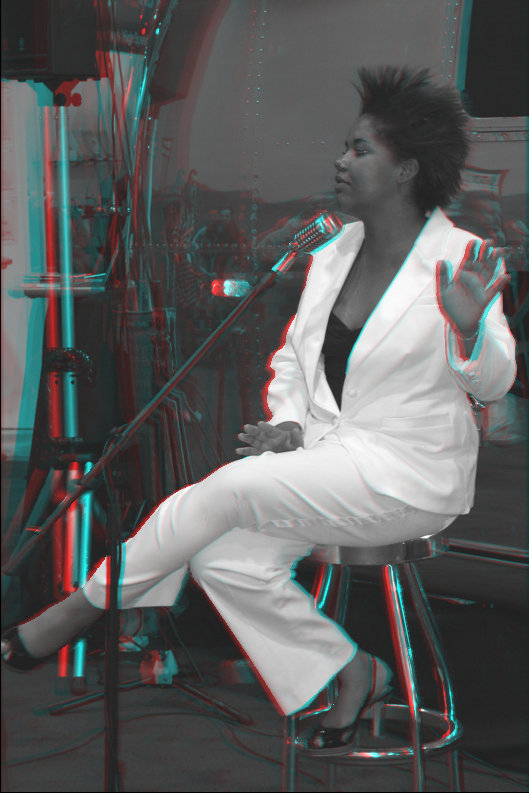
Animated GIF exported from StereoTracer
Now look carefully at this animated image again.
If you were attentive enough you might have noticed that there’s a small inaccuracy of the depth map. Look at the part of the chair, where the singer’s foot is placed.
And now look at how I corrected the depth map: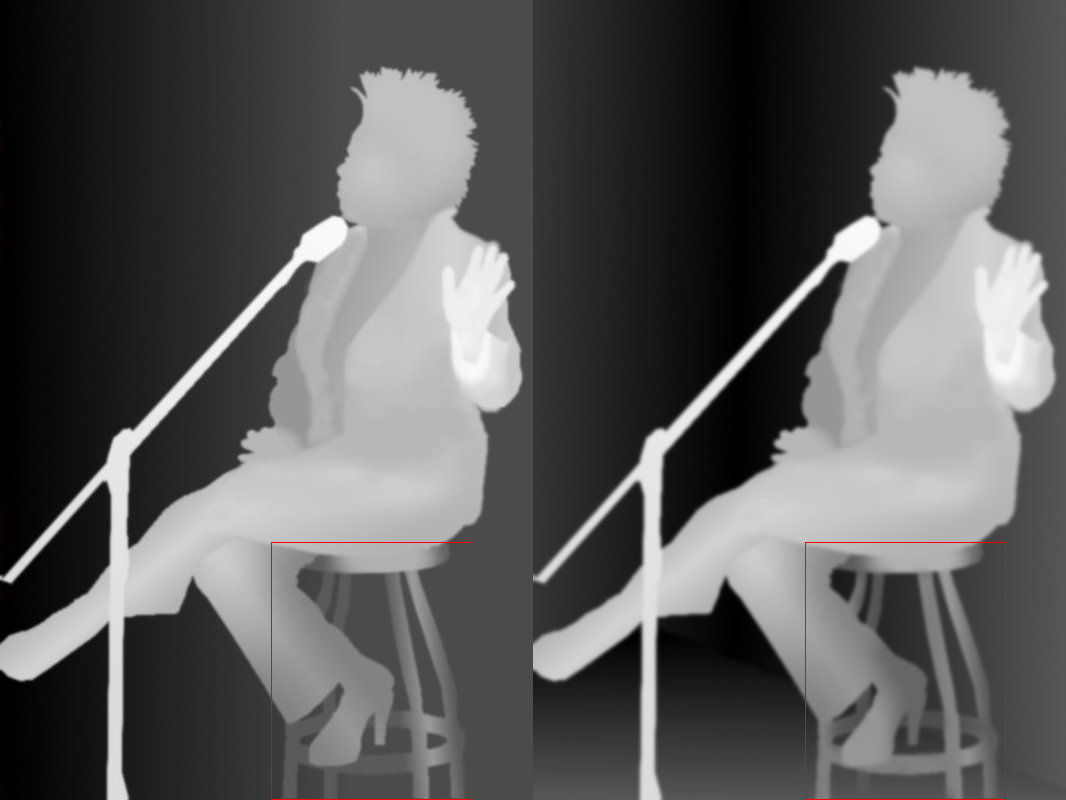
New depth map:
Animated GIF with the new depth map.