
The Parallax Measurer tool in 3DMasterKit
2025-12-21 Alexey Polyakov
The Parallax Meter in 3DMasterKit: A Case Study in Lenticular Printing
Let us discuss a valuable tool — the Parallax Meter in 3DMasterKit — using a real‑world project as an example: lenticular printing of 3D souvenirs (bookmarks and magnets) for the Museum of the World Ocean in Kaliningrad.
Specifications
Lenticular lens: 75 LPI
Number of frames: 64
Sizes:
Magnets: 75 × 75 mm
Bookmarks: 50 × 210 mm
The Parallax Meter proved indispensable for this project. Printing was carried out by Stereograd.su. A specialist from the company provided recommended parallax values, which allowed us to:
- design the layout;
- prepare a 3D sequence of frames to ensure the best possible 3D effect.
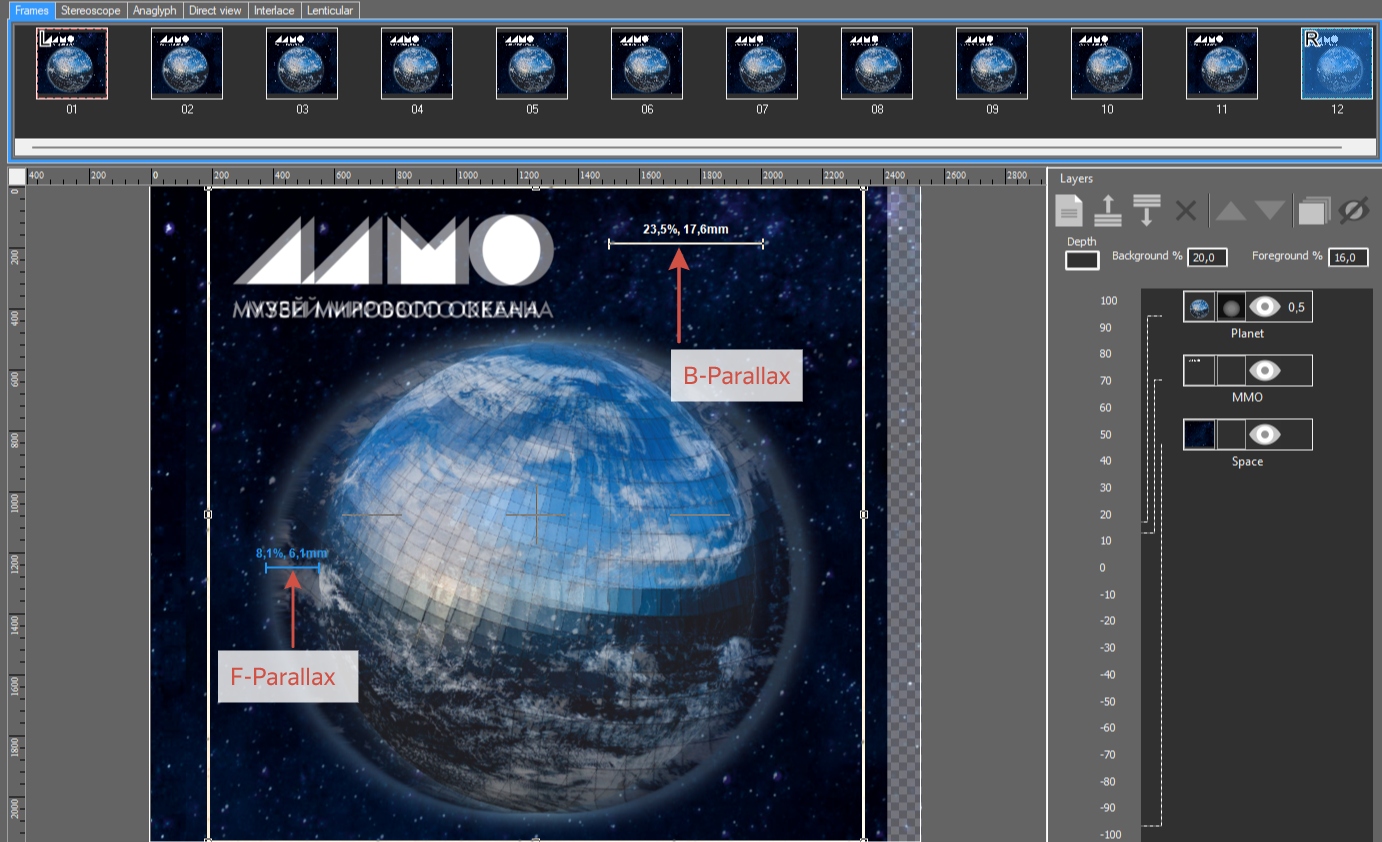
Understanding Parallax in Lenticular Imaging
When the left and right frames of a stereo pair are overlaid, relative displacements of scene objects become visible. These offsets differ between foreground and background elements and are termed parallaxes:
- foreground parallax (параллакс переднего плана);
- background parallax (параллакс фона).
Parallaxes determine the strength of the 3D effect in lenticular images. They can be measured in several ways, for example:
- as a percentage of the image width (useful when the final print size is unknown at the modelling stage);
- in millimetres (recommended by experienced lenticular printers based on their knowledge of specific materials, equipment, and scene composition).
- In such cases, it is advisable to follow the experts’ recommendations and adjust the layout to meet the required parallax values.
How the Parallax Meter Works
The Parallax Meter in 3DMasterKit enables precise measurement of object displacements in a 3D scene. It displays values in both % and mm, allowing users to fine‑tune the 3D scene composition.
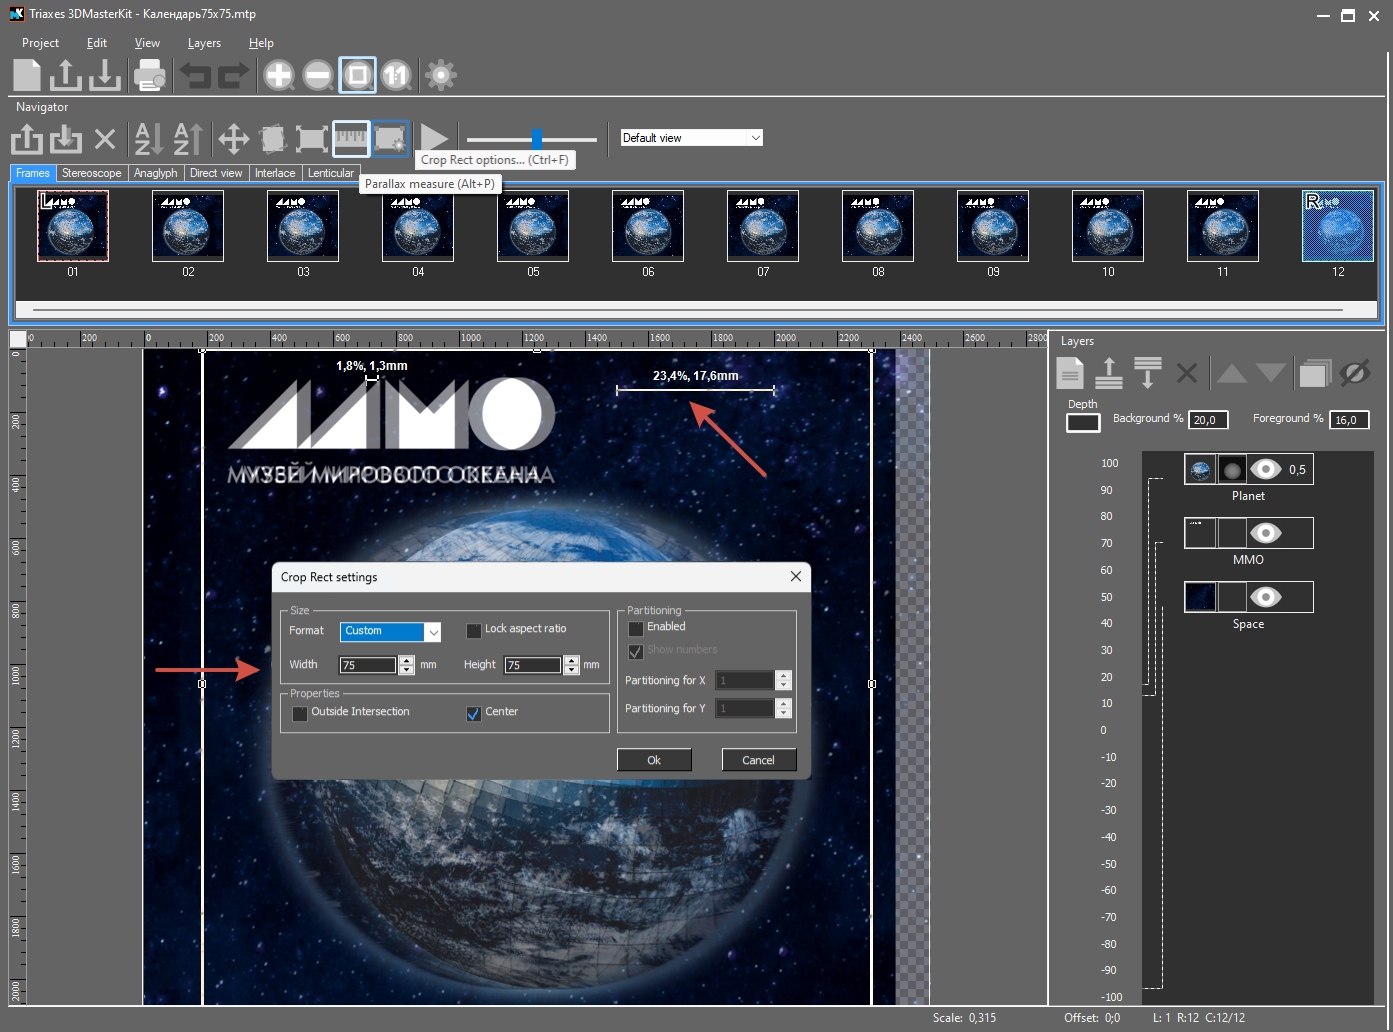
Step‑by‑Step Guide to Using the Tool
- Set the physical size of the final product in the «Cropping Frame» settings.
- Generate a test frame sequence and select the first and last frames. Enable transparency blending mode.
- Use the Parallax Meter to measure object disparity:
- Click the left edge of an object;
- Drag to the right edge;
- Release to obtain the measurement.
Case Example: Recommendations from Stereograd
Victor, a printing specialist at Stereograd, advised the following parallax values for 75 LPI lenticular lenses:
Text parallax: ~1.5 mm;
Background parallax: 15–20 mm;
Foreground parallax: 10–15 mm.
Compositional Adjustments and Rendering
By arranging layers along the Z‑axis (text and planet closer, stars farther away), I adjusted the rendering parameters to achieve the desired parallaxes. To enhance the planet’s 3D volume, a depth map was added.
Additionally, 3DMasterKit allows users to:
- create an animated preview of the 3D effect;
- export the preview as a video file for client review.
The animated preview provides a clear idea of how the final image will appear in motion.
The finished products meet all technical specifications and deliver an impressive 3D effect. Special thanks to Victor and the Stereograd team for their expertise and support!


