
Using 3D MPO stereo pair to create glasses-free 3D lenticular photo
Alexey Polyakov, Triaxes, 2011. Updated 2019.
A stereo photo can be viewed in different ways: on the 3D W1 camera screen, with the help of digital photo frames offered by Fujifilm, using the anaglyph method. However, you can make a 3D lenticular photo and view it without any glasses. Such a 3D photo can be put on the table or sent to your friends.
Using Triaxes software we can easily convert a stereo photo to a 3D lentricular photo to view it without glasses.
For example we have following stereo photo:

Source: http://gadgeter.jp/bbs/file/1_0.html
Stage 1. Multi-view Tracing.
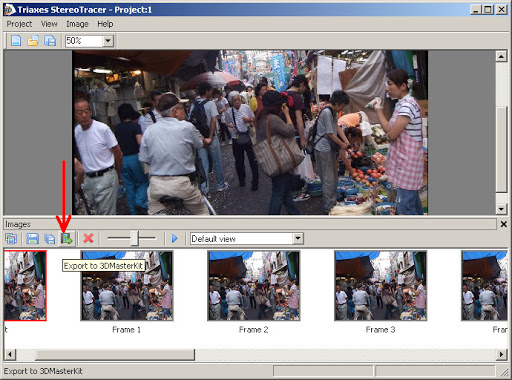
We use Triaxes StereoTracer software.
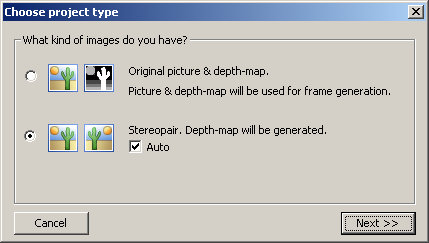
1. Launch the program and go to Project -> New. Select Stereopair and flag Auto.
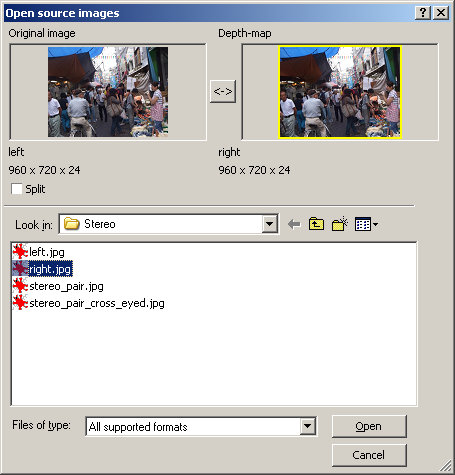
2. Select the Left and Right images and press Open.
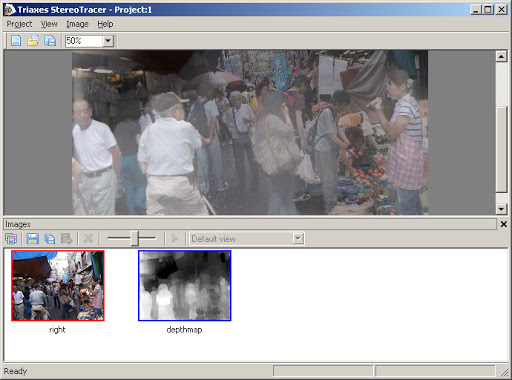
3. SrereoTracer automatically generates a depth map. In the depth-map image the gray color gradation shows each pixel’s distance from the viewer. The lighter areas in the depth map correspond to the areas nearer to the viewer, the darker ones correspond to more distant areas.
4. Press Generate Frames, select the rendering method and press Start.
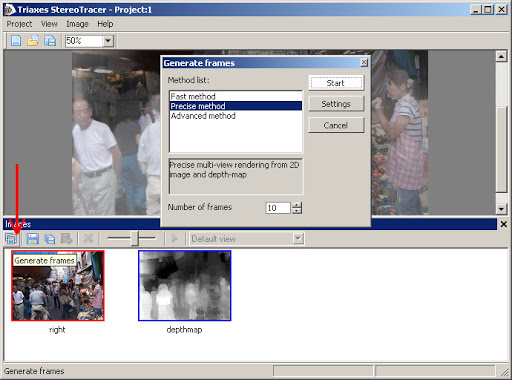
5. After that a number of frames will be created. A series of frames simulates shooting of a scene from different points along the horizontal line. Press Export to 3DMasterKit.
Stage 2. Generating lenticular image
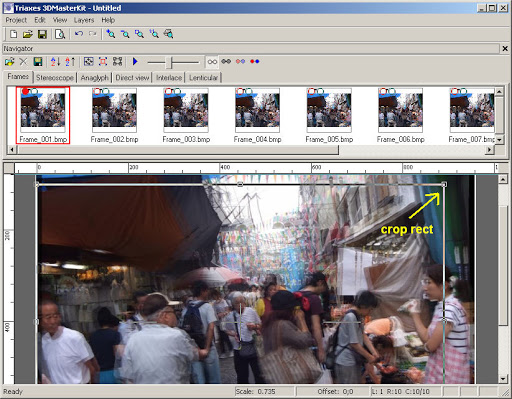
Use Triaxes 3DMasterKit software to generates (encode) images for glasses-free viewing via the lenticular lens.
0. Once the images have been exported from StereoTracer to 3DMasterKit you will see all frames in the 3DMasterKit program. There you can use “crop rect” to select the part of the image you are going to interlace.
1. Open the Lenticular tab of the 3DMasterKit application, make settings appropriate for lenticular plastic that you going to use and press Generate (To display/To file).
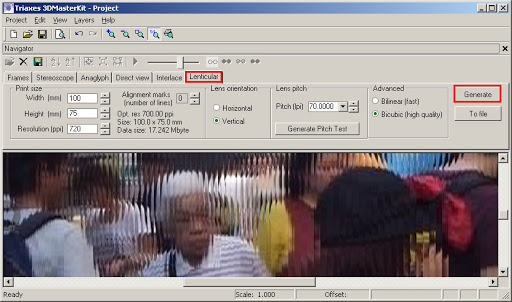
2. Print the generated image using an inkjet printer and adjust to the lenticular plastic.
The animated preview of the rendered 3D series is shown below:

Update 2019. Watch video how to convert MPO for Looking Glass Holographic Display
Looking Glass Holographic Display has incredible potential to show multi-view images with llarge parallaxes. It is recommended to use parallax settings in the range 50%-100% and the number of frames 45-100.
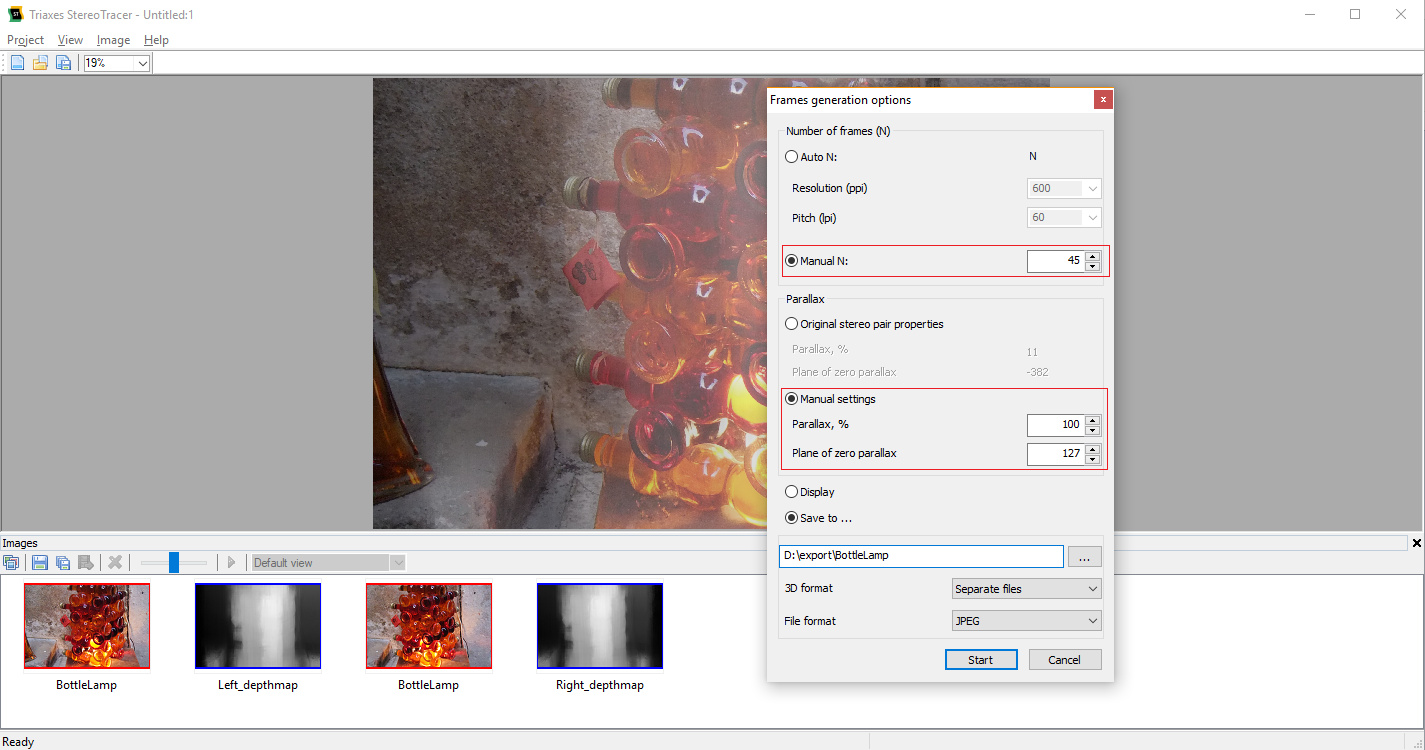
Triaxes StereoTracer generation settings for Looking Glass Holographic Display


