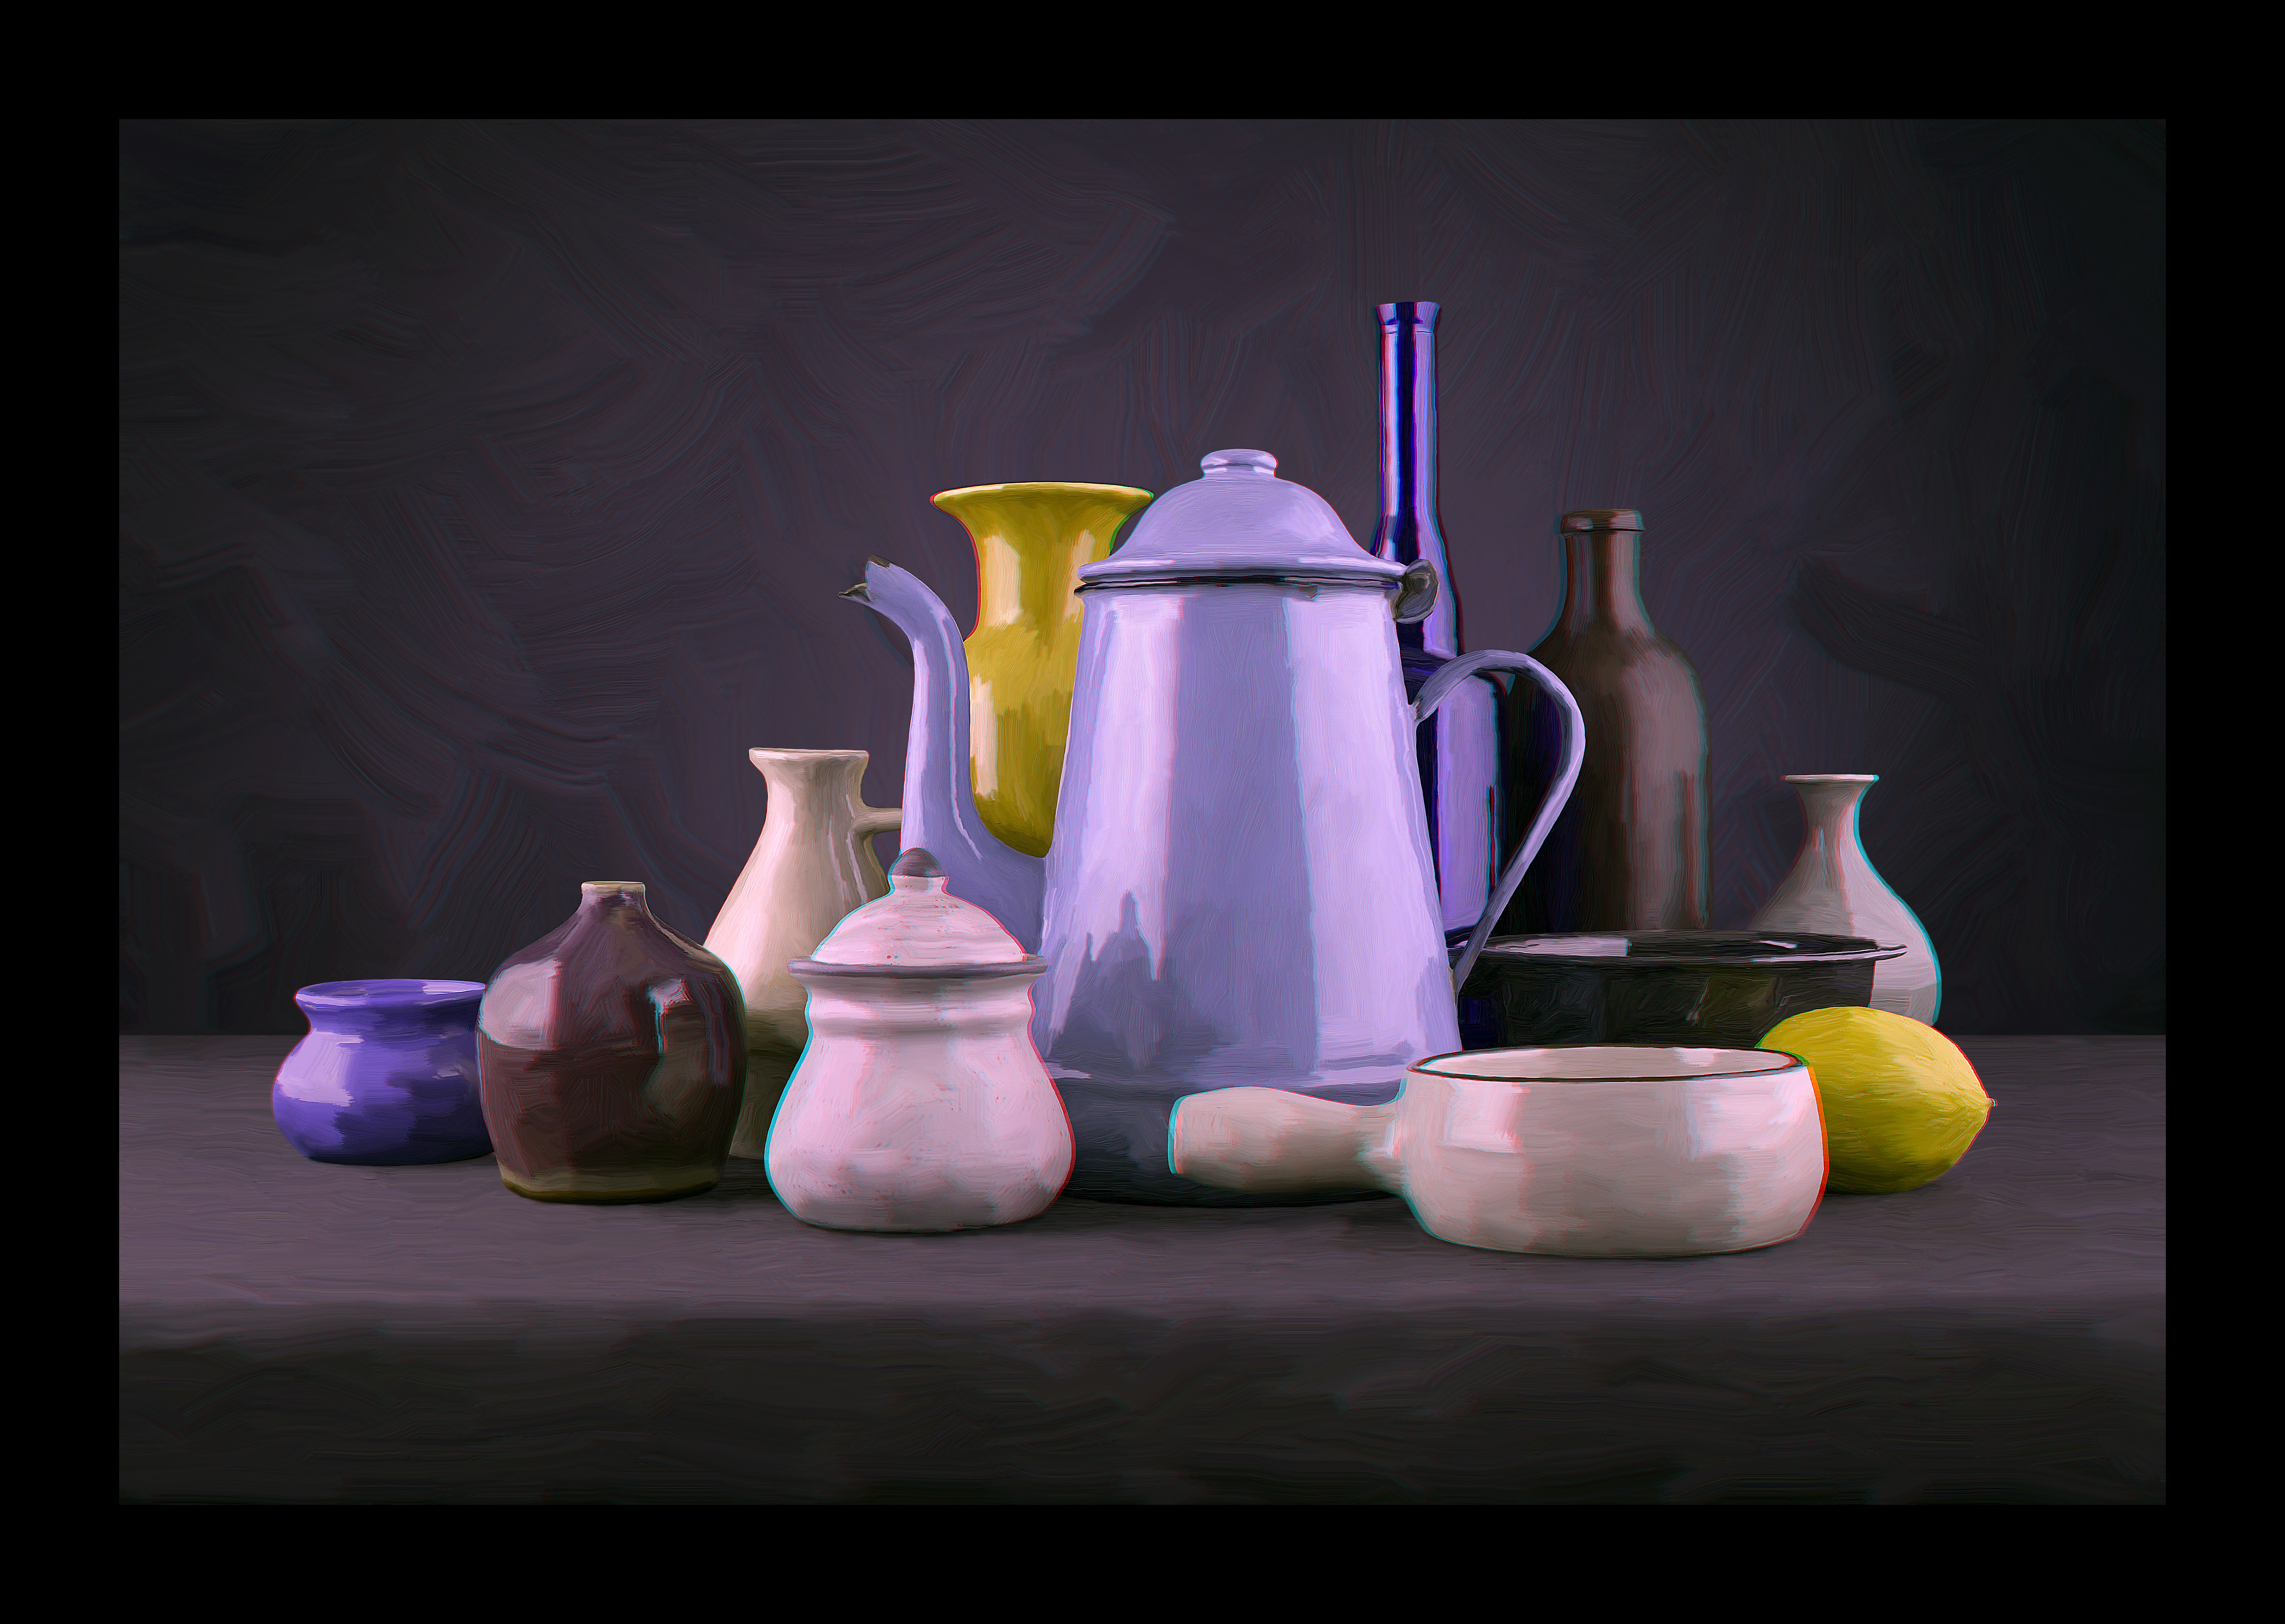
Creating 3D still life for anaglyph or lenticular viewing
Daniel Richards
The good people at Triaxes have asked that I share some of my unique insights into fine art 3D development using StereoTracer software and so I have decided to offer something that everyone can appreciate. It’s a three dimensional still life designed for either lenticular or anaglyph viewing. For the purposes of this tutorial I will assume a few things on your part. The first is that you are a digital photographer and that you have a handle on digital negative processing in some sort of software like Photoshop. The second is that you understand the concept of stereo processing in either anaglyph or lenticular and finally you have passion, lots of passion. I cannot teach you the needed background behind what I am explaining. That will be up to you to research and discover for yourself but for those of you who know this you will find this tutorial very easy to follow indeed.
As an artist for over 40 years and as the head of our Multimedia department at the National Gallery of Canada, I had unique access to some of the most powerful technology and software in the field of 3D. Part of my arsenal to which I owe some of my success to is StereoTracer. This amazing piece of Triaxis software has the power to revolutionize the 3D fine art world and with this detailed workflow description I hope to demonstrate one aspect of how this can be easily achieved. I hope you enjoy what is a small part of my 30 years of 3D development as an artist and thee dimentionalist. You can visit me at www.danielrichardsgallery.com in Lunenburg Nova Scotia Canada.
A WORKFLOW DESCRIPTION
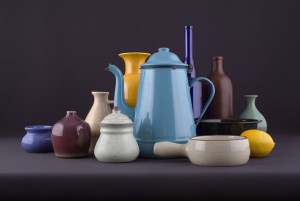
Below are several key images representing key points of development in this workflow. The first image is the original photograph. I will later explain how to achieve this caliber of photography so that your still life’s are as professional as mine.
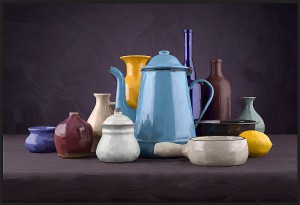
The following step is optional. Many of my new works remain as strait photographs in 3D but here I decided to alter this work into a digital painting as seen in the photo below which I executed in Photoshop using their Smear tool and Dry Brush. Again you will have to teach yourself how to achieve what I am talking about.
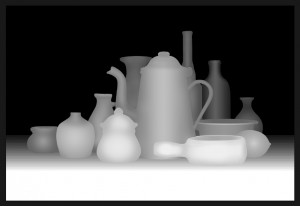
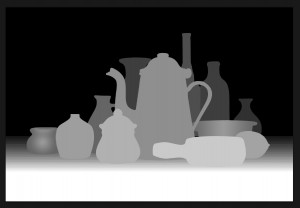
The goal is to convert the photo or the painted image into a discreet stereo pair using something called a depth map in Stereo Tracer. Here is the actual depth map that I created to tell Stereo Tracer exactly how to convert the 2D image above into a true discreet stereo pair left and right image. Don’t worry its very easy or at least it is now.
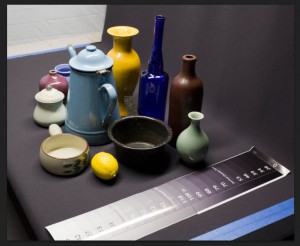
The most difficult thing to achieve when trying to create a DM is to estimate exactly where each object lies in Z space as opposed X and Y. People sturggle with this and in the end give up because its all a mess. In the photo below I enlarged and then printed a simple gray scale which I placed alone side of the composition. Now I can tell in an instant exactly at what level of gray each object occupies in Z space (depth). If you have a finished compositon like this its simply a matter of measuring the exact Z space each object occupies in respect to the gray scale. I am not interested in the front or back of each object, only its center in respect to the gray level that it intersects. For example the black sauce pan seems to occupy gray level 99 right down the center of the pan while the brown bottle at the back 53. In just a few seconds I have the gray levels for each of the objects in my scene and this gives me everything I needed to build a perfect DM. From this I was able to assign a gray shade to each object. This placed the entire composition at the correct depth. Simple and straightforward.
The following will take some knowledge of image processing software. You simply take the original MI photo and cut out each object using either the polygon tool or some other that will allow you to place a marquee around the object like the lemon. Then in software like Photoshop, I convert that selection into a new layer. Then I turn the marquee back on to keep the next step inside that selection. Using the paint bucket tool I apply the shade of gray that the lemon occupies in Z space and you’re pretty much done once you have all the objects looking like the image below.
We now have a very flat looking map in shades of gray that Stereo Tracer understands and uses to place everything in Z space from front to back. It does this by building an image array starting from the left image over to the right. For our purposes we are only interested in the first and last image of the array. More on this later. The difference between the DM above and the one below is that I have taken time to model each object’s shape in the one above. This also tells Stereo Tracer how to shape each object from its front to its back. This is not needed as I have found that just the flat gray DM, when combined with what is called Stereo Vision Cues, which are the cues the brain uses to see 3D and there are many, is enough to cause us to see a full 3D round image. Detail modeling enhances this. You will again have to learn more about this on line.
Its is important to realize that all my work is intended for print viewing, not monitor viewing, which is part of an on going exhibition I update every spring in my Lunenburg Nova Scotia art gallery www.danielrichardsgallery.com This is just one work of many that will be displayed this summer season. The image quality in print format far surpasses what can be viewed on a monitor in this tutorial. There are virtually no ghosts in the print and each image is silky smooth. This image is only 66% of the finished print resolution and has noticeable ghosting.
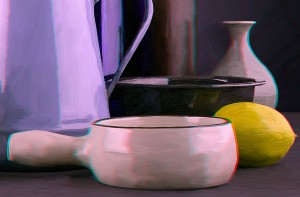
Finally here is a close up of a small section to show what is possible with this workflow. Remember these two images are in anaglyph format and will appear burred without the proper viewing glasses. Again any digital artifacts you see are not present in the glossy paper print. By the way the best image I have found so far for this comes from an HP Z2100 printer. I have 3 large format units in my studio. You can pick up a 24 inch version for well under $2000. They are amazing!
MORE DETAIL ON THE WORKFLOW
1) CONTROLLING THE LIGHT by Setting Up the Studio
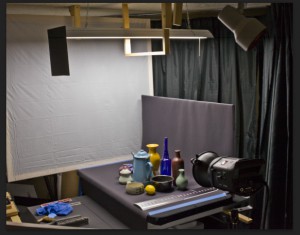
I do not care how good an artist you are with composition or how well you have mastered your software, if you cannot take an exquisite photograph of your composition you are dead in the water when it comes to stereo development because all 3D is based on photography. Here I will simply show you how to achieve perfection every time no matter what your photographic competence or equipment. Its not the camera that will make the difference but it does help, its the light the camera sees. Light comes in 4 forms, direct, incident, reflected and diffused. Each offers different levels of shadow control. Direct is the shortest line to the light source. Its truly a harsh light. Incident is angulated light which hits the objects surface from an angle and gives long shadows much like the direct sun and a blue sky but late in the day. Reflected light, such as a flash off of an umbrella, is much like a sunny day with white fluffy clouds which allows the sunlight to bounce off the clouds becoming some what diffused because their is a much larger perceived light source. Finally completely diffused light which is pretty much your cloudy overcast day. Its diffused light that removes all shadows and for anaglyph 3D development this is the preferred as it minimizes something called ghosting in this format. Again you will a have to teach yourself everything about anaglyphs. For image quality, like the photo at the top of this tutorial, the light must be completely diffused especially when the subject’s surfaces are shinny. The light source can be anything you wish. I used flash on both left and right sides of the scene as shown below. In between the composition and the flash I stood two tall square sheets of $10 white shower curtain that you can purchase at any Home Depot store. It is diffused plastic that allows light to pass through it but still hides enough so that the entire sheet of plastic lights up like one huge light. Nothing is as soft as diffused light through a transparent diffuser like the set up you see below. I have removed the large white diffuser that goes on the right of the composition so you can see the setup. Behind the large white diffuser in the picture below sits the other flash. What the scene sees is one huge light when the flashes fire pushing light into every nook and cranny of the composition which fills in all shadows. If you can diffuse light enough then almost all shadows will be removed giving a soft professional look that is hard to beat. Now this can have its draw backs too. If I were to have set the lights more forward near the front of the scene with the diffusers in the front also rather than directly to the sides then the shadows would be so minimal that I would have lost the sense of roundness to each object. As a result I kept the lights to the left and right allowing some shadow to exist in the center of each piece of porcelain. The right and left sides were more highlighted than the center. This is important as modeling of a shape is important to something called visual stereo cues. It helps the brain perceive shape.
The camera I used for the shoot was a Canon 5D MK2 and the flashes used were Bowens GM 200 costing about $700 for the two head kit. It came with umbrellas and stands and is available in any good camera store. 5000k fluorescents work well also as well as halogens but with halogens you have heat to contend with and both will require much longer exposure times. With flash and fluorescents you do not worry about either. The fluorescents are also available at Home Depot and are called Sunshine. They have the colour temperature of 5000 degrees Kelvin marked right on them. Again if you do not understand what I am talking about then you have a lot of work to do in the field of photography.
So putting it simply, place one light source on the left and right of the display and a large diffuser of some type between the light and the subject and you cannot go wrong. Last is your exposure. Many people talk about ETTR. This is about Expose To The Right style of shooting. This works fine for landscape work etc. but in this case it will not work as you will always end up compressing your highlights when you try and recover them. This will cause loss of detail inside each transparent highlight where surface information lies. Make sure you do not over expose the shot at all and use your lowest ISO for minimal noise. Then simply develop the exposure till everything looks pleasing and your ready for Stereo Tracer. For those of you who know and understand HDR photography this will work well also if your camera is a little noisy. The simplest method is to use only two shots. The first is not over exposed at all. The second over exposed by about one to two stops. Then use Photomatix Fusion to join them together for the perfect photo. Again more learning work on your part.
2) BUILDING THE COMPOSITION
Here is where the art lies. I cannot teach you how to do this. You either have it or you don’t but I can point out a few pit falls along the way in respect to 3D. The first is the depth of the scene. The total physical depth in inches of the scene from the front of the table top to the black cloth was 24 inches. All the subject matter in the center occupied 16 inches from front to back. The center of the scene to the camera sensor was 36 inches. If the scene is too deep then we will get two artifacts that we do not want in our stereo images. If in anaglyph format then you will get what is called excessive ghosting which is cross talk between left and right images caused by imperfect glasses filters, red and cyan. Nothing is perfect. In Lenticular you will simply get an out of focus image near the extreme depth of field. The zero parallax point, which is where both images are focused together will be the clearest and the farther away your subject lies from that point the more out of focus it will become. This has to do with lenticular technology and not your lens. Keeping things shallow will play in your favour in both cases. If your goal is anaglyphs then colour will not be critical as most of the colours will be subdued and shifted towards green and yellow spectrum as part of the side effects of working in the anaglyph format. Lenticular will preserve all your colours so pay attention to this if this is your goal. Other than that its your right brain that knows what feels right when composing.
3) THE LENS
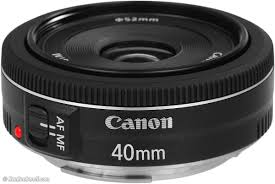
Most do not realize what I am about to tell you, even those in the field of 3D. If you use a 50mm lens you are basically taking a photo at what the human eye sees. If your focal length increases then you are going to compress what the human eye sees in respect to perceived depth and this can cause that flat cardboard effect in your stereo images if certain conditions are met. If you use a shorter focal length than 50 then you will expand the perceived distance between all objects in your image giving a sense of greater depth and an exaggerated roundness to the entire scene. After a lot of experimentation over the years I have found that a 40 mm lens is ideal for this type of studio work. It is an odd focal length but luckily Canon just brought out their new Pancake prime 40 mm which sells for $200 and is completely amazing. This is your perfect studio lens for shooting stereo still life’s. I am also assuming a full size sensor when I quote this focal length. This is the lens I use for all my studio work. By the way the reason you want 40 mm is to just give the image that added bit of roundness caused by the visual depth expansion between each object caused by shorter focal length lenses which guarantees objects will be round without a flat front feel as well as exaggerating the stereo depth between all the occluded objects. Only experience can teach you this as well as a sound knowledge of photography.
4) FOCUS
The more you have in focus the better so large f stops are a must. I shot this scene at f16 which guaranteed I got everything in acceptable focus from front to back. I focused on the front of the blue kettle. Don’t worry about diffraction. This lens is so perfect I hardly noticed any and chromatic aberration was none existent. You can employ focus stacking instead if you wish but this can cause problems with dual image stereo pairs as the aligning of each stacked image in the end can cause stereo texture violations on the surfaces of your images. If your objects have little texture then you will most likely be fine but this only applies to the use of stereo pairs and here we are not using this. We are using one image only with a depth map so focus staking will work nicely.
5) MORE ON STEREO TRACER
Now that we have both images ready to go its a simple matter of opening Stereo Tracer and loading them into the software. You will load the (MI) main photo first and then in a second window load the (DM) depth map. Then you simply tell ST how many images in its out put array. This software is designed for lenticular array generation and in this case we do not need an array. We need just the left and right images in the array so telling it to generate only 3 images gets what we want. Next we set the starting parallax to 3. This tells the software how much 3D to apply to the image. A parallax of 3 is near human vision while 6 would have a hyper level of 3D but also generates a lot of ghosting. Finally you need to set the zero parallax point which is the point at which the images align over one another perfectly. This will be the center of the stereo scene and will also correspond to the stereo window position. Anything in front of this point will protrude in front of the stereo window and anything behind will be inside. If you do not understand what I am talking about it means you have to learn something about stereo imaging. The tutorial on the Triaxis website for Stereo Tracer will definitely fill in many of the blanks.
6) VIEWING THE ANAGLYPH
Finally below is the finished anaglyph in stereo which can be viewed using any red/cyan anaglyph glasses. The best glasses I have found for monitor and printing viewing are made by American Paper Optics in the US.


