
Creating lenticular images with motion effect
Using the lenticular lens you can create images with the 3D effect and other image effects.
There are various image effects depending on the types of image change: flip (2-image swap), motion (object movement), zoom, morphing (seamless transition of an object into another one).
Let’s call such images “animated images” or images with the motion effect.
The image is changed when you change the viewing angle. For small images that are viewed by turning the image in hand the horizontal lens orientation is usually used. For large-format images that are viewed when they are passed by the vertical lens orientation is used.
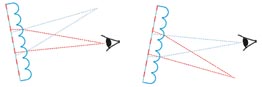
Fig.1. This is how the flip effect works (the first frame is marked by the red color, the second frame is marked by the blue color).
Let’s consider animated image creation out of a frame series (Fig.2).
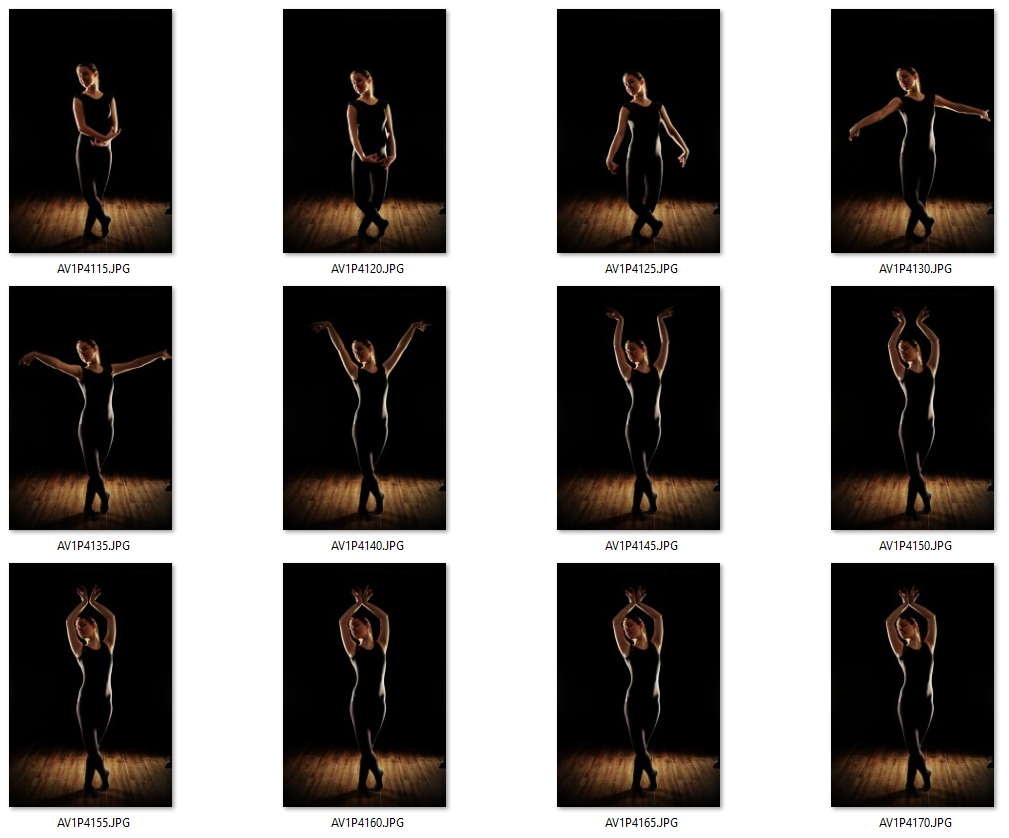
Fig.2. The frame series is kindly furnished by Guillaume d’Hubert – 3dgh.fr
See how great the image looks on the computer screen (Fig.3)
.
Fig.3. – The frame series is combined into a gif-image.
Let’s make a lenticular image out of these frames.
We take a 50-lpi lenticular sheet with the wide viewing angle intended for animation.
For printing we use Canon with the resolution of 600 PPI (pixels per inch, do not confuse it with dots per inch).
Theoretically, we can encode 12 frames so that each frame gets at least 1 complete pixel (600/50=12).
Then we investigate the printing process.
We use the USB microscope camera to see the encoded and printed image on paper in details and evaluate how the lenticular lens works.
Let’s have a look at the pitch test with the microscope (Fig.4).

Fig.4. We use the USB microscope to see the printout in details.
When observing the encoding strips of the pitch test through the lenticular lens from different angles we see different strips of the encoded image (Fig.5). The same way the lenticular lens works when it separates different frames of the encoded image.
Fig. 5 When we change the viewing angle different strips of the encoded image are seen through the lens.
Let’s see what happens when encoded images with different numbers of source frames are printed.
.
Video 1. The investigation of the animated image printing process using the 50-lpi lens and a printer with the resolution of 600 ppi.
Zoomed-in fragments of printed encoded images with different numbers of frames are shown in Fig.6. You can see that even though the image is visible when we use 12 source frames, the encoding strip of a separate frame is faint – it is barely seen. When we have 6 frames the situation is getting better, while with 2 frames we can clearly see how 2 images swap.
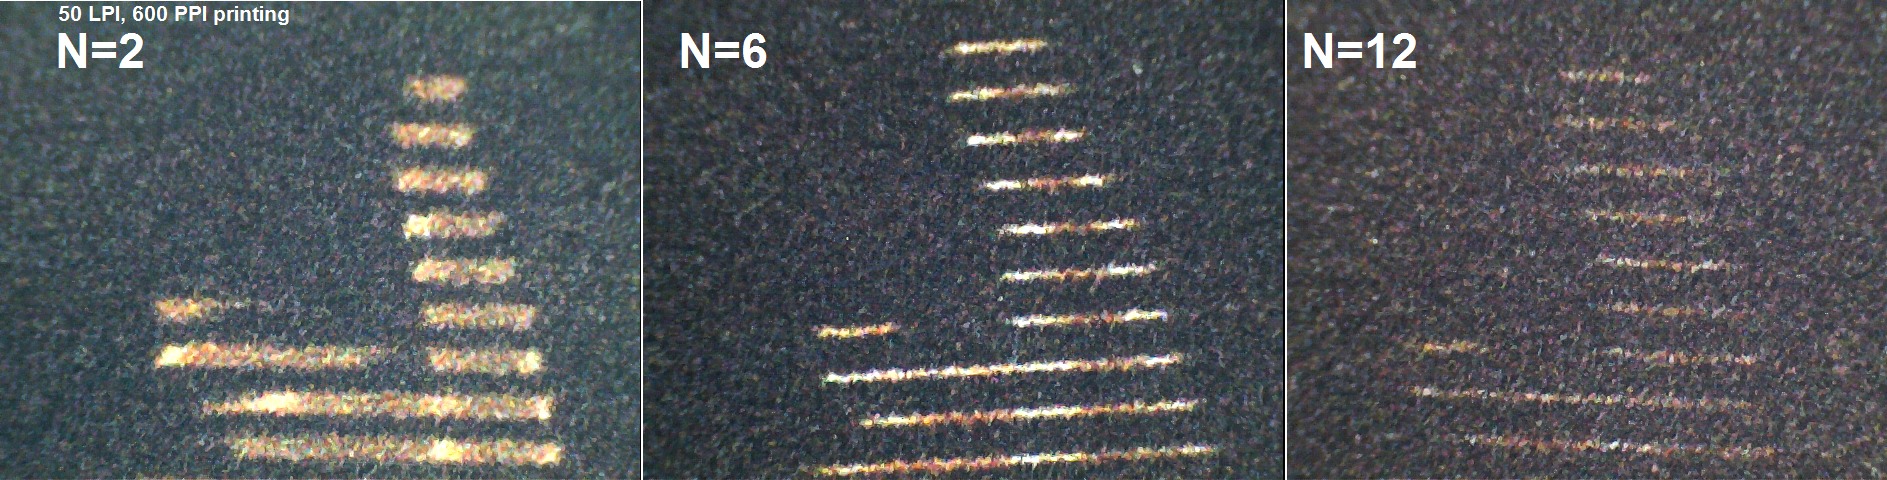
Fig.6. Zoomed-in fragments of the printed encoded image with different numbers of frames. Printed with Canon, 600 PPI, glossy paper, encoded for 50 lpi.
Conclusion: printing resolution (not only the one stated in the printer specification, but the real one – on paper) should be much higher than lens’s LPI, so that you can get clean-cut frame separation. It means, you should use the lens with the greater pitch.
Here’s an example of the animated (morphing) image (object contour and color swap) on the 20-lpi lenticular lens printed on Mimaki with 720 PPI (video 2).
Video 2. Printing a lenticular image with the morphing effect on the 20-lpi lens, printer resolution – 720 PPI.
When making this morphing image we used 15 separate frames combined into a 30-frame series (from the 1st to the 15th one and from the 15th to the 1st one). It should be noted that this printer has very high accuracy of printing. The printing goes right onto the lens so ink doesn’t soak/smear into the paper pores. As a result we get the image of high quality.
Animation is a difficult kind of produce requiring high printing resolution.
When printing on paper or the 75-lpi lens using a printer you won’t get a good result because ink smears, paper has fiber and it’s difficult to get clean-cut frame separation.
To get animation of high quality you need to do the following:
- The lens pitch should considerably (by 30-40 times) exceed the printing resolution.
- It is preferable to use the lens with the wide viewing angle (40 and more degrees) intended for animation (flip).
- When you design source images try to avoid moving contrast objects. For example, a black object on a white background.
Design tips
- The number of frames for animation depends on the smoothness of motion you want to get.
You can use the following formula N=R/L, where “R” – printing resolution, “L”-LPI of the lenticular lens.
However, you should also take into account the above mentioned real printing quality. - To create cyclic movement (without any “jumping”) you can try the following:
Create N/2 frames (take some movie scenes) and then make a code chain in the following order: from 0 to N/2 and then again to 0.
Example: N=18. We take 9 frames (0-8) and form a chain (list of frames for encoding). 0 1 2 3 4 5 6 7 8 8 7 6 5 4 3 2 1 0 - If you can’t get good image separation – take fewer frames.
It is better for the animated image to have 2 frames and, as a result, you get clean-cut frame separation. The produce quality in this case will be better. - Use morphing. The morphing effect looks more eye-catching when the form is smoothly changed in the image.


