3.2 Depth map of the layer
Each layer in a template can have a depth map, which provides the 3D effect for the ready image. There are 2 ways to add a depth map to the layer: automatic and manual. In the Layer properties panel there is the Layer Depth Map subsection with the "Open..." and "Create..." buttons, as well as a miniature of the current depth map for the layer (Fig. 3.4).
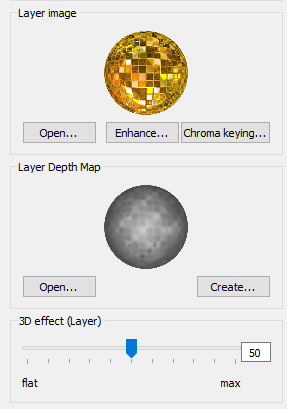
Fig. 3.4. Selected layer's image and depth map previews
Open... - you can open a depth map created in a third-party editor. Standard file formats (extensions) are supported: .png, .bmp, .jpg, jpeg, .tif or .tiff.
Create... - open the Depth map generation dialog for the chosen layer (Fig.3.5):
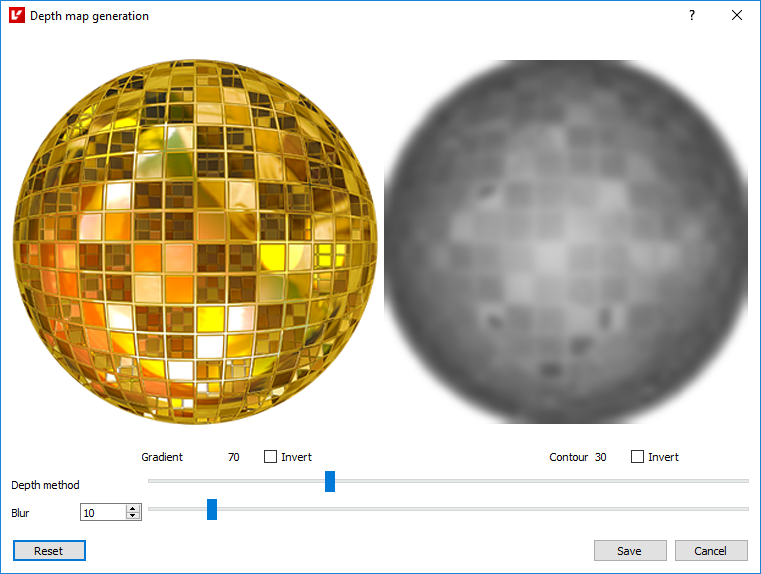
Fig. 3.5. Depth map generation dialog
On the left there is a layer image, on the right - a depth map generated with the current parameters, including:
Depth method - allows you to combine 2 depth map creation methods and set the degree for each of them. A value of "0" corresponds to the depth map generated entirely with the gradient method, while the value of "100" corresponds to the contour method;
Blur radius - degree of blur for the mixed-mode depth map. Value range: 0..100;
Invert (Gradient depth map) - invert pixels of the gradient depth map;
Invert (Contour depth map) - invert pixels of the contour depth map.
The "Reset" button allows you to restore the default parameter values.
The default values of these parameters are set in the program Settings on the Depth map tab (see section 2.7 Program settings).
If the Automatic depth map generation option is activated in the program Settings, the depth map will be created automatically when the camera captures the image in the Live VUE mode.
You can also open this window when adding a photo in the 3D wizard ("Advanced depth map..." button).