3.3 Chroma key editor
When capturing an image by the camera, or when adding a photo to the project, the auto-chroma keying is used: the sole-colored image background (green or blue one) is deleted. However, some parts of the background may preserve, and objects (or people) may lose some parts of their silhouettes. To avoid this, choose the necessary layer, then click "Chroma keying..." to open the Advanced chroma keying dialog window (Fig. 3.6.).
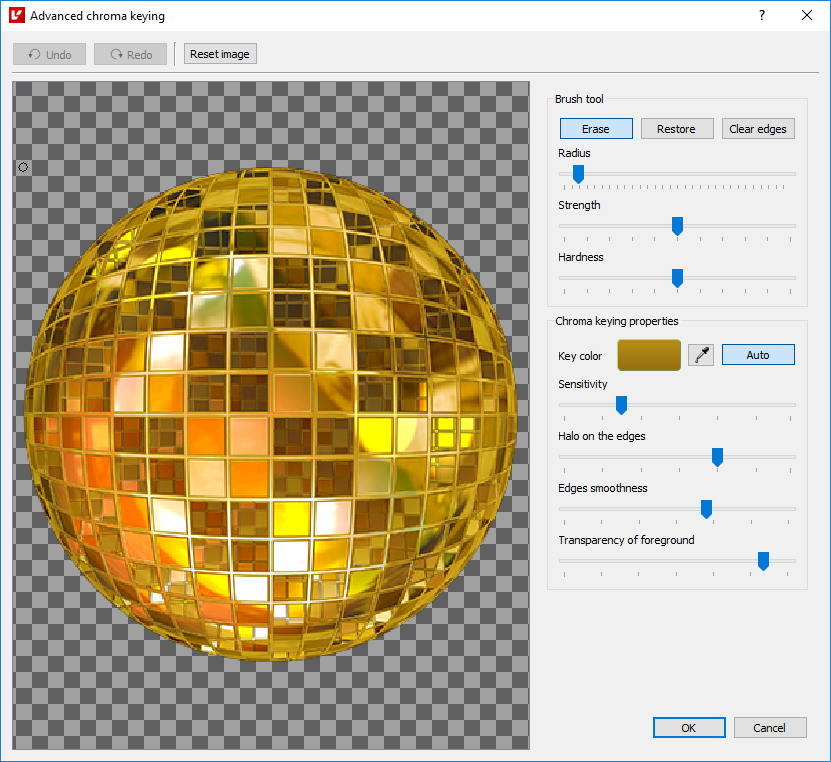
Fig. 3.6. Advanced chroma keying dialog
The dialog contains the following settings and commands enabling image editing:
- Undo/Redo - cancel or redo the previous action correspondingly;
- Reset image - reset to the default settings;
- Brush parameters:
- Erase, Restore or Clear edges;
- Radius;
- Strength;
- Hardness.
- Key color - this color of the background is erased. By default, this color is defined automatically. But you can also set the key color for deletion manually;
- Sensitivity - width of the color range for the key color to be erased;
- Halo on the edges - halo around the visible area;
- Edge smoothness - edge smoothness of the visible area;
- Transparency of foreground - color sensitivity for foreground deletion.
This window can be opened from the main software work area from the Project properties panel when a layer is chosen, or when a photo is added in the 3D or Flip wizard ("Advanced chroma keying..." button).