2.7 Depth map of the layer
![]() - depth map of the layer.
- depth map of the layer.
The icon to the right of the image indicates the depth map availability for this image.
Depth map (Z-image) is a grayscale (black-and–white) image. Pixel brightness in the depth map reflects the remoteness of the corresponding original image pixel from the viewer: lighter parts correspond to objects located closer to the viewer, darker ones - to more distant objects. A white pixel in the depth map indicates that the respective source image pixel is the most proximate to the viewer (foreground); a black one is the most remote (background); gray gradations correspond to intermediate (middle) objects.
Using a depth map provides additional volume to layer-objects, resulting in a more natural look and better effect.
Depth map creation
To create а depth map for the layer, select the layer in the layers window and open the context menu of the layer by pressing the right mouse button. Then press "Generate depth map..." (key: D). The depth map generation dialog will appear (Fig. 2.7.1).

Fig. 2.7.1. Depth map generation dialog.
There are two types of depth map generation and their mixture: gradient and contour. The Depth method slider sets the percentage values for both types for depth map preview. Check the Invert checkboxes to set negative pixels for each depth map generation type. The Blur slider sets the blur effect for depth map preview, it has the value range of 0-100. Press "Save" to apply the parameters and generate the depth map for the current layer.
You can draw the map, for instance, using Photoshop or GIMP. (The example of manual depth map creation is provided here). Save the map you have drawn as a separate image with transparency or as a layer to a .psdd file.
The existing depth map can be attached to the layer using one of the two methods:
1) Upload the depth map from a separate file (if the depth map is saved as .tiff, .jpg, .png, .bmp or .gif file). To do that, right-click on the layer image on the list and select “Load depth map...” in the context menu (key: L);
2) Assign the adjacent layer as a depth map (if the depth map is saved as a layer in the same .psdd multilayer file). To do that right-click on the layer image on the list and select “Attach top layer as depth map” or “Attach bottom layer as depth map” in the context menu.
Note: Generating a depth map is only supported for layers in the CMYK color model, and the depth map loaded from the file must have the same color model as the multi-layered template.
You can edit the layer depth map in such external editors as Paint, Adobe Photoshop or GIMP without interrupting the work process in 3DMasterKit.
Select "Edit depth map in external editor..." in the layer context menu (key: E). A temporary file with the depth map will be opened in the external editor. After saving the changes in 3DMasterKit the alert dialog will appear (pic. 2.7.2). You can disable this dialog and depth map automatic update for the layer by checking "Automatically load the saved image from the external editor" in the above mentioned dialog or in the settings dialog. You can select the external editor or set Paint as a default editor in the settings dialog.
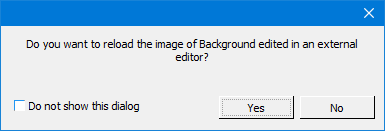
Pic. 2.7.2. Alert message about depth map update
Depth map factor
You can force or reduce the strength of a depth map by setting up the depth map factor. If the layer contains a depth map there is the Set depth map factor.. option available. The depth map factor value is saved as a layer parameter in a template file (.psdd). Value ranges are: 0 to 2, where 1 is a default value.
The following commands are also available in the context menu of the layer:
- Rename - change the name of the layer;
- Layer to image size - enlarge layer image sizes to sizes of the largest image, usually it is a background of the template;
- Edit layer histogram - open the histogram dialog with the layer image;
- Edit depth map histogram - open the histogram dialog with the depth map image;
- Save depth map as - save the layer depth map to a .tiff, .jpg, .png or .bmp file;
- Clear depth map - delete the depth map of the selected layer.
The resulting project (template) can be saved as a .psdd file, the map can be editted if necessary. Note that if the .psdd file is editted and saved in Adobe Photoshop, it will preserve the information on the layer serving as the depth map.
To display or hide the Layers window from the screen use the View >> Layers menu command or hot keys: Ctrl+L.
Note: working with lists in 3DMasterKit program is similar to working with Windows lists – for mouse group selection use the Shift key, for mouse direct selection use the Ctrl key.
Useful tip: to show or hide a group of layers: select upper layer in the list, then click Shift and holding Shift click on the lower layer. Besides, there is a button ![]() – show/hide all layers - in the Layers window toolbar.
– show/hide all layers - in the Layers window toolbar.