4.2 Making a flip photo
To create a photo with the flip effect you must create a Flip project. There exist two scenarios:
- using a wizard and a green/blue-screen photo;
- using the Template panel and capturing a photo with the camera.
Using the Flip wizard scenario
To create a photo with the Flip effect using the wizard you need to perform the following actions:
1. Create a new project by running the File >> New flip photo... command, or by clicking  on the toolbar (Fig. 4.8).
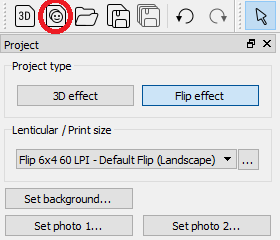
Fig. 4.8. Main toolbar
2. The software will run the Flip project wizard (Fig 4.9.).
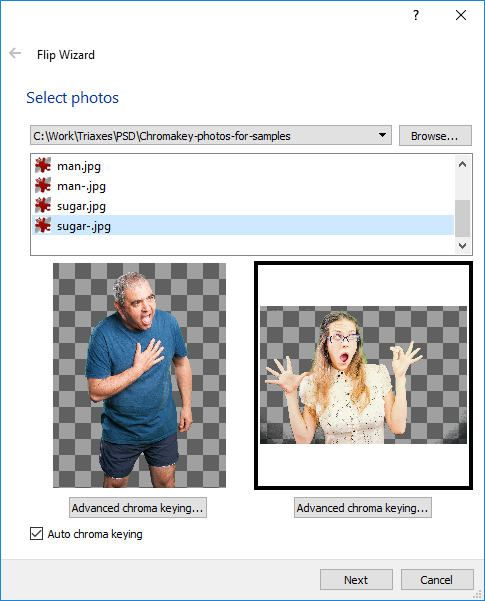
Fig. 4.9. Photo selection for flip project
Click the Photo 1 (or Photo 2) area, then click "Browse..." and choose a photo on your computer. When selecting a photo from the list, you will see the preview of the processed photo below. Auto-processing includes background deletion (chroma keying), if the corresponding option is checked: Auto chroma keying. You can change this option in the program Settings >> Advanced tab (see section 2.7 Program settings). If necessary, you can process the image chroma key manually.
Advanced chroma keying... - open the dialog to manually delete or restore the background for one of the photos using the key color. For more details see 3.3 Chroma key editor.
Click "Next" to go to the next step. Click "Cancel" to exit the wizard.
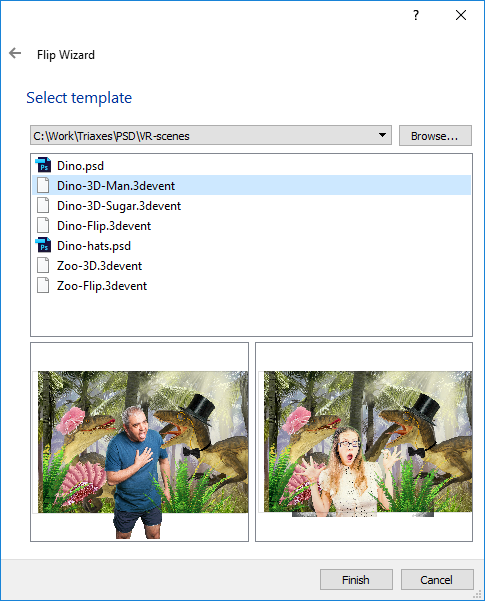
Fig. 4.10. Template selection for flip project
3. Now choose a template for virtual scene creation. Click "Browse..." and choose the required template. In the preview area you can see how the chosen photo will automatically fit the template (Fig. 4.10).
Click "Finish" to finish working with the wizard. Click the left arrow at the top of the wizard window to return to the previous step. To exit the wizard click "Cancel" - no project will be created.
4. After the project has been created, you can change either the background image (Background layer) or the photos (Photo 1 and Photo 2 layers). Click "Set background..." in the Project panel to choose the image file or click "Set photo 1..."/ "Set photo 2..." to choose the photo on your computer (Fig. 4.11).
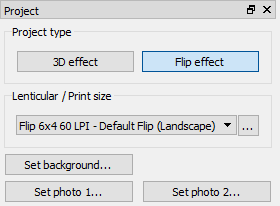
Fig. 4.11. Project panel
5. To generate a flip photo go to the Lenticular tab in the work area. You can zoom in or zoom out the image display area, save the image to a file, or print the generated image by clicking "Print..." (Fig. 4.12).
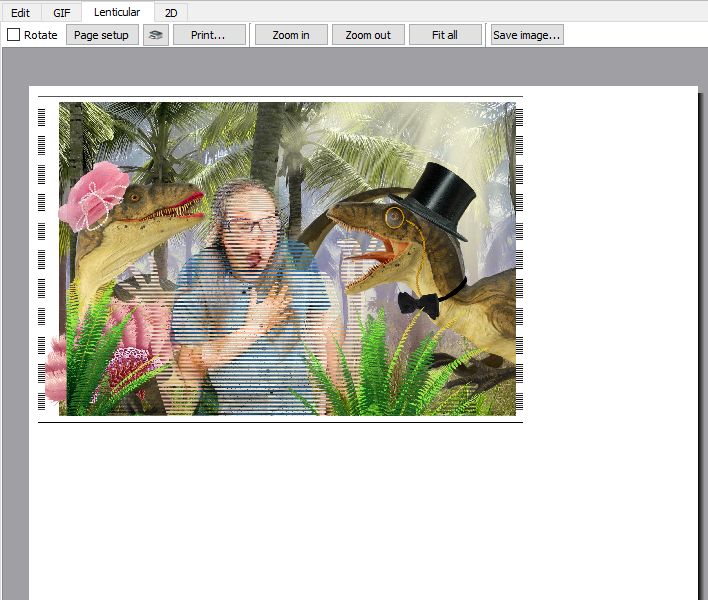
Fig. 4.12. Lenticular flip image tab
You can also get an animated GIF image and a usual 2D image by choosing the corresponding tabs.
Using a template and a captured photo scenario
1. Select a template from your computer by clicking "Browse..." in the Template panel on the left side of the software main window, or choose the required template from the list of templates located in the latest folder used (Fig. 4.13) .
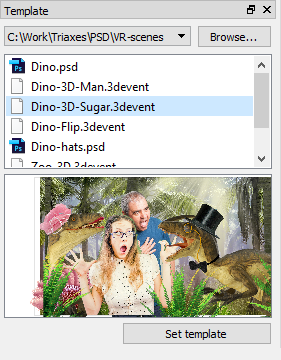
Fig. 4.13. List of templates
2. Open the template in the project for editing by clicking "Set template".
Now the project is available for editing. You will be automatically focused on the Layers tab, where you can edit the project, adjust separate layers and capture photos by the camera.
3. Activate the Live VUE mode by clicking  on the toolbar (Fig. 4.7.), or clicking the button on the Live VUE screen (if the mode has been already activated earlier).

Fig. 4.14. Live VUE toolbar
4. Click ![]() on the Live VUE screen or toolbar to take a photo with a 5-second delay.
on the Live VUE screen or toolbar to take a photo with a 5-second delay.
5. Repeat steps 3 and 4 if you want to take a new photo.
6. After the the project has been created, you can change the background image (Background layer). For that click "Set background..." in the Project panel to choose the image file. If you want to add a photo to the project click "Set photo 1..." or "Set photo 2...".
7. To generate a flip photo go to the Lenticular tab in the work area. You can zoom in or zoom out the image display area, save the image to a file, or print the generated image by clicking "Print...".
You can also get an anaglyph image, an animated GIF image, a stereo pair for the stereoscope and a usual 2D image by choosing the corresponding tabs.