3.3 View modes
Sorting
Frames are added to the project in the order in which you select their names in the Open Source Images dialog (see Fig. 3.1). The list of images in the project is displayed in the Frames tab of the Navigator window.
The sequence of images on the list influences the result of the lenticular encoding. Images must be arranged in the order of shooting from left to right. The Frames tab has two buttons: Sort descending and Sort ascending which you can use to sort images by their file names in the alphabetical (A-Z) or counter-alphabetical (Z-A) order.
Changing transparency
In order to simplify the correction process of the image position towards each other, the Active image (the image selected at the moment) is shown overlapping the image set as the Left frame. Furthermore, you can regulate transparency of the Active image relative to the Left frame with the help of the Transparency slider. The leftmost position of the slider corresponds to the full transparency of the Active image. In this case only the image set as the Left frame is seen on a screen. The rightmost position of the slider corresponds to the full opacity of the Active image.
![]()
Fig. 3.5. Changing the frames transparency
Currently in all editions there is a new ability to keep the transparency of the source frames. During the lens encoding process the area with a transparent layer which lies within the crop rectangle remains transparent.
Frames series view modes
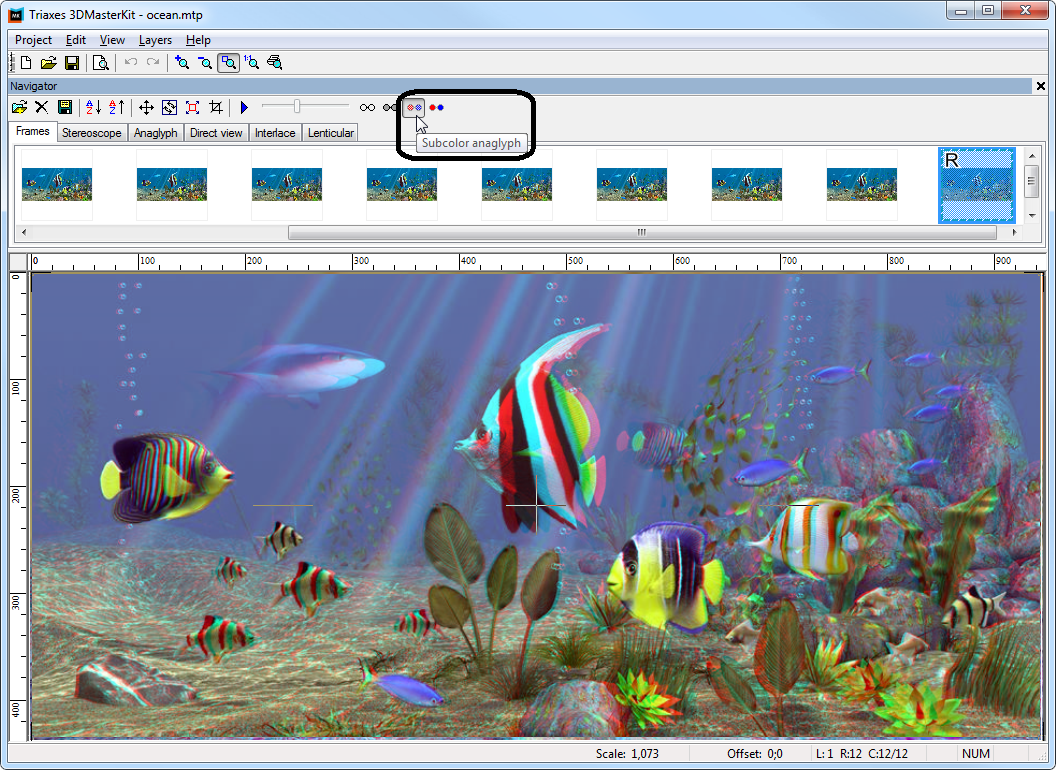
Fig. 3.6. Anaglyph view mode
To simplify the image matching, there are several view modes available in the Frames tab. You can select one of the four view modes from a drop-down list - normal and anaglyph of three types: monochrome, quasi-colored, and colored. The anaglyph mode is used to view the stereo effect at a stage when you match images, which might be quite helpful sometimes.
When viewing such an image using the anaglyph glasses (with red and cyan glasses), you can observe the stereo effect.
Zooming images in and out
Zoom in:
Menu command: View >> Zoom In.
Hot keys: + (“plus” on the keypad))
Toolbar button: 
Zoom out:
Menu command: View >> Zoom Out.
Hot keys: - (minus on the keypad)
Toolbar button: 
Fit to the screen:
Menu command: View >> Fit on Screen
Hot keys: Ctrl+0
Toolbar button: 
This command zooms images so that they completely fit to the program window.
Actual size (in pixels):
Menu command: View >> Actual size
Hot keys: Ctrl+Alt+0
Toolbar button: 
This command zooms the image as 1:1, i.e. one pixel of the image corresponds to
one pixel of the display.
Print size:
Menu command: View >> Print Size
Hot keys: Ctrl+Alt+P
This command zooms the image so that its size on the screen is the same as when it is printed.
Zooming in and out with a mouse:
You can also zoom images in and out by mouse scrolling.
Animation view
Sequence of frames can be played by pressing Animation in the toolbar, or the View >> Animation (Spacebar) menu command, or pressing the Spacebar key.
Fig. 3.7. Animation view
The playing speed is changed in the Settings dialog by the Project >> Settings menu command.
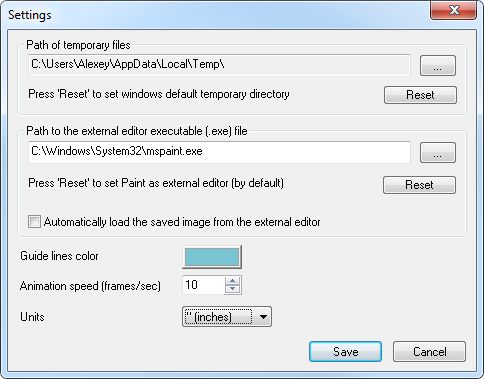
Fig. 3.8. Settings dialog
Choosing measurement units
Also in the Settings window you can choose the measurement units: mm or inches. This option is applied for all the software and will be saved until the next adjustment. If you change the measurement units while a lenticular or any other image is being prepared, the set-up parameters (width, height, etc.) will be automatically converted into the chosen measurement system.