2.9 Creating anaglyph images
3DMasterKit allows you to create anaglyph images of the following types: grayscale, sub-colored (quasi-colored), and colored.
To create an anaglyph image, do the following:
- Create a new project or open an existing one;
- Add two stereo pairs frames to the project;
- Specify, which of the frames is the Left frame of a stereo pair and which one is the Right frame and set the zero parallax point.
- Crop images the way you like.
- Switch to the Anaglyph tab of the Navigator window (see section 2.4). A color anaglyph image will be created. To change the type of the anaglyph image (colored, sub-colored, grayscale), you should select the corresponding item in the View Mode group box. The Color mode is designed for generating anaglyph images with fully saved color rendition, which may cause some noise when viewing the image through the anaglyph glasses: red and blue-green colors present in the frame image may get on the eye retina, which they are not suited for, and thus may cause discomfort. The Grayscale and Subcolor modes can be used to eliminate these defects.
- The finished image can be either printed or saved to a file. The project can be saved as an .mtp file. All changed settings will be saved in the project.
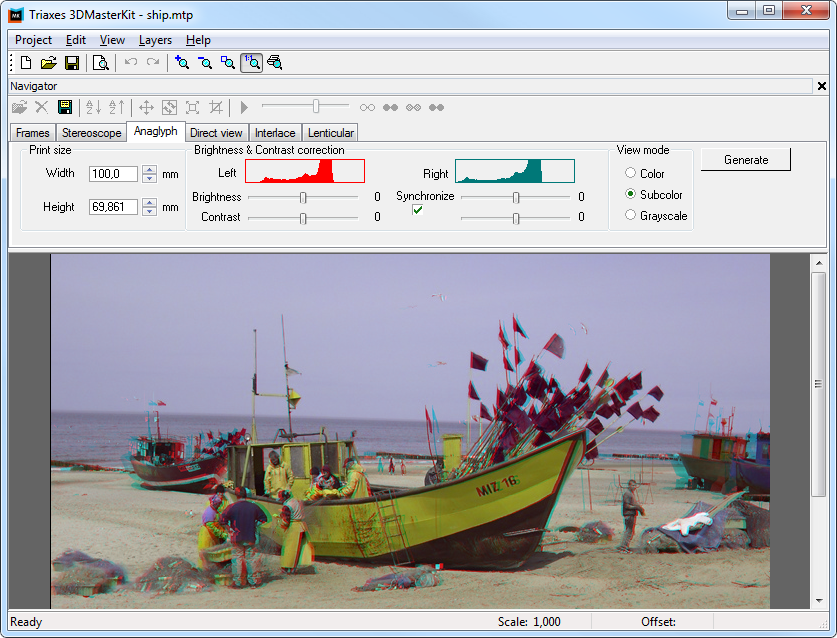
Fig. 2.8. Anaglyph tab in the Navigator window (photos made by Piotr Nawracała)
In the Anaglyph tab you can specify the size you want to use for printing in mm or inches. When you change the size, the proportions of the image are preserved. You can change them by cropping the image. Here you can find the image brightness histogram and control elements which allow to change brightness and contrast either separately or simultaneously in each of the color channels used in an anaglyph image.
After you click Generate, the image with the specified parameters will be generated.