4.3 2D to 3D conversion
This article focuses on how to convert a 2D photo to 3D with the help of Triaxes 3DMasterKit. In our example we use the image of a city and are planning to create a large-format lenticular 3D image.
Here's the video demonstrating the whole conversion process in detail:
Some expanded commentaries on main stages of the process are given below
1. Adding a layer to the project
Start Triaxes 3DMasterKit and create a new project, then add the photo to the project as a layer (Layers >> Add… (Alt+Shift+O)). Select the layer (left-click on the layer icon) and set its position at Depth = 0 (See fig. 4.3.1).
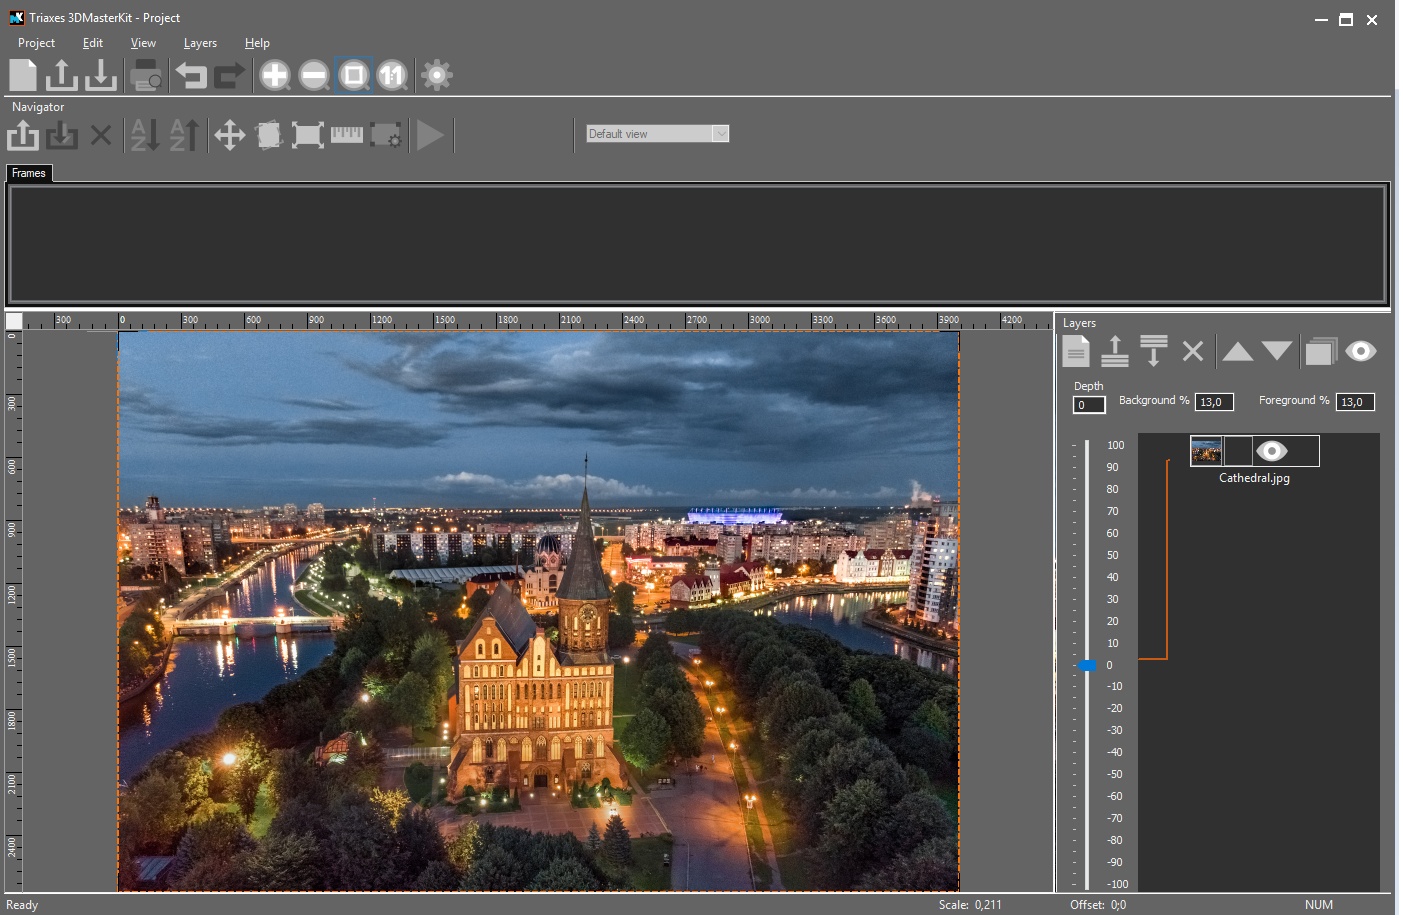
Fig. 4.3.1
2.Adding a depth map to the layer
Depth map is a subsidiary gray-scale image, where pixel brightness (usually ranging from 0 to 255) indicates distances to image objects (the brighter the object the closer it is to the viewer). See Fig. 4.3.2.
There are different methods to create a depth map for the image. For example, a depth map can be drawn in a graphics editor (you can get more info on depth map creation methods by following the links at the end of the article).
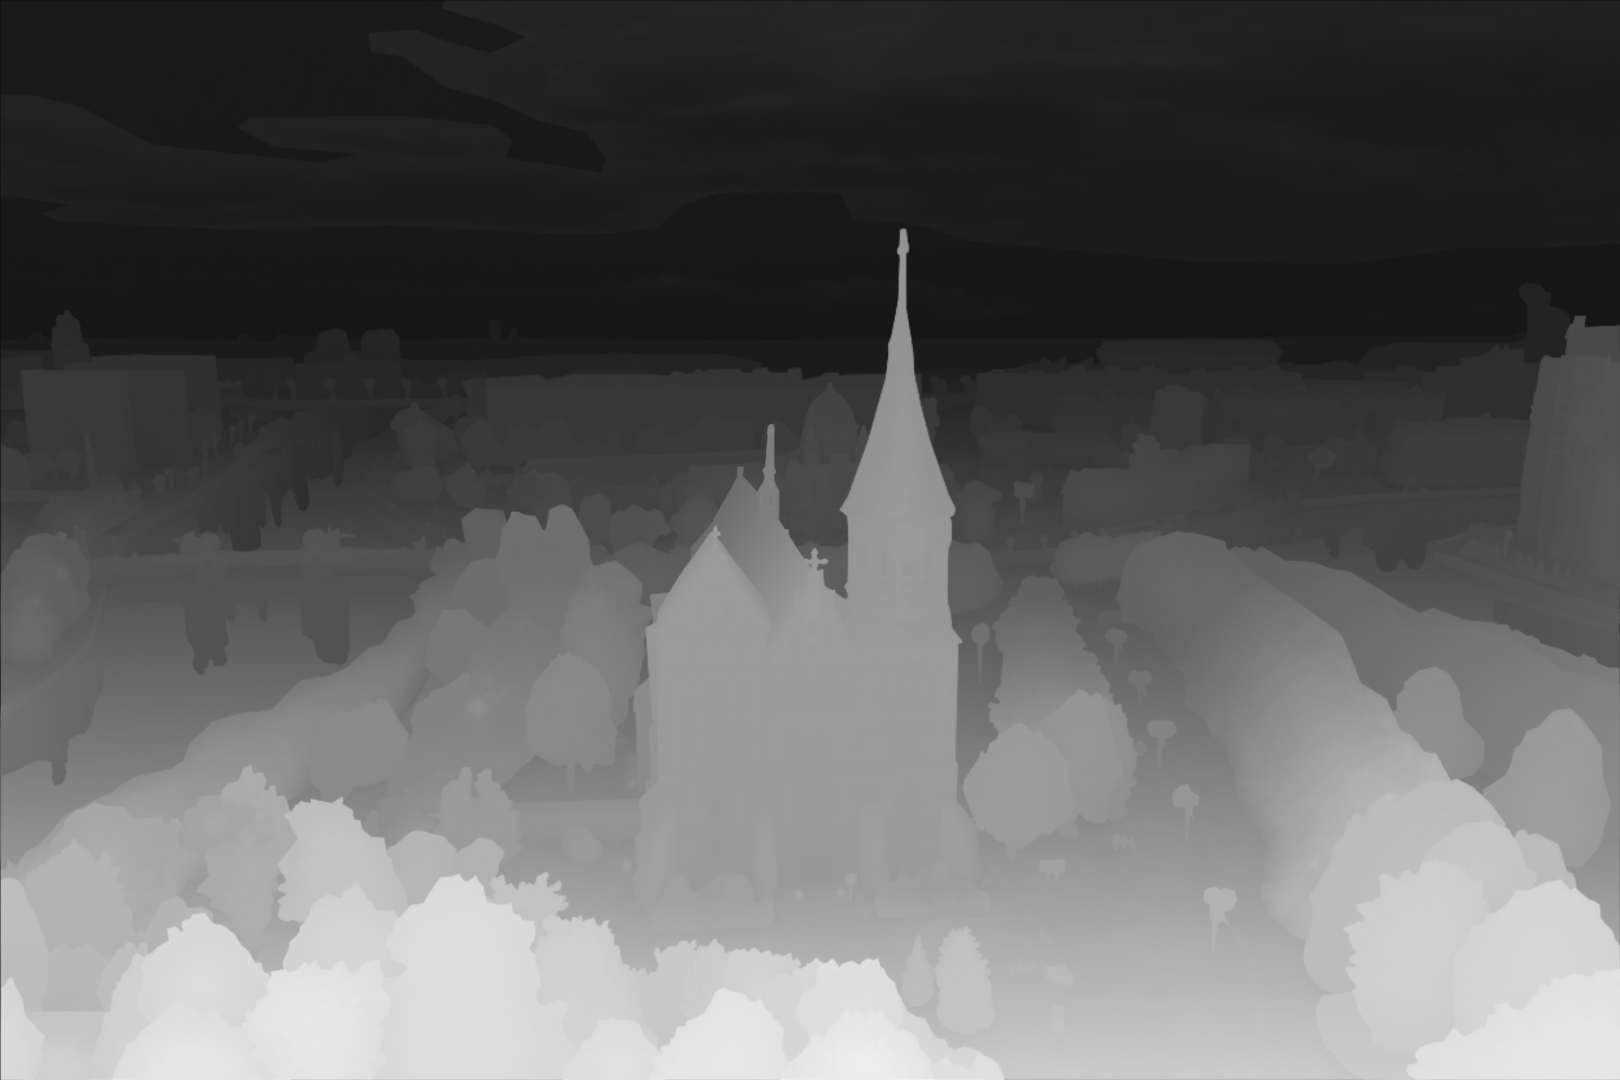
Fig. 4.3.2
To add a depth map right-click on the layer icon and choose Load depth map… (L) from the context menu. Then choose the depth map and add it to the project (See Fig. 4.3.3). The depth map and the image must have identical image sizes.
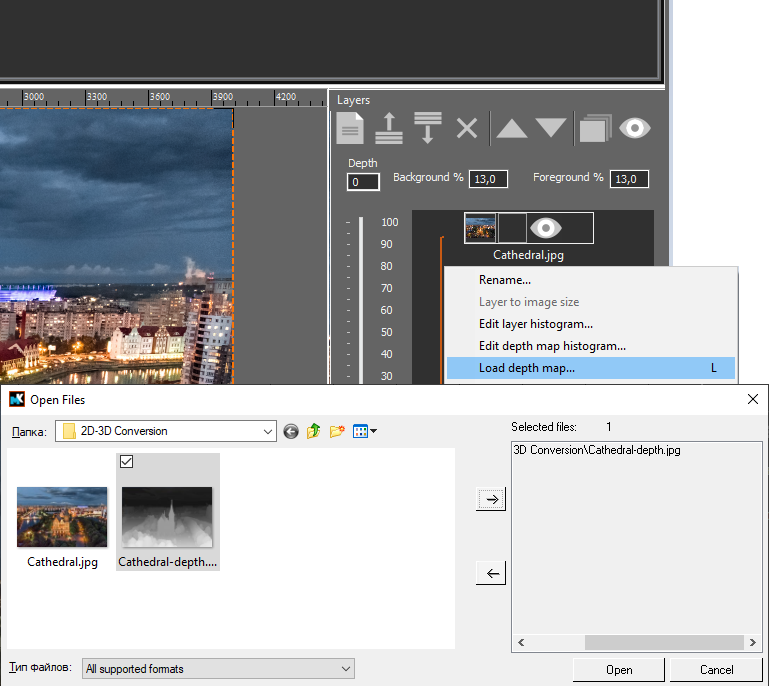
Fig. 4.3.3
3. Preview of the effect
After adding the depth map to the layer you can evaluate the 3D effect being created. For that generate a series of frames (Layers >> Generate multiview… (Alt+G), or press the corresponding button on the Layers panel. See fig. 4.3.4).
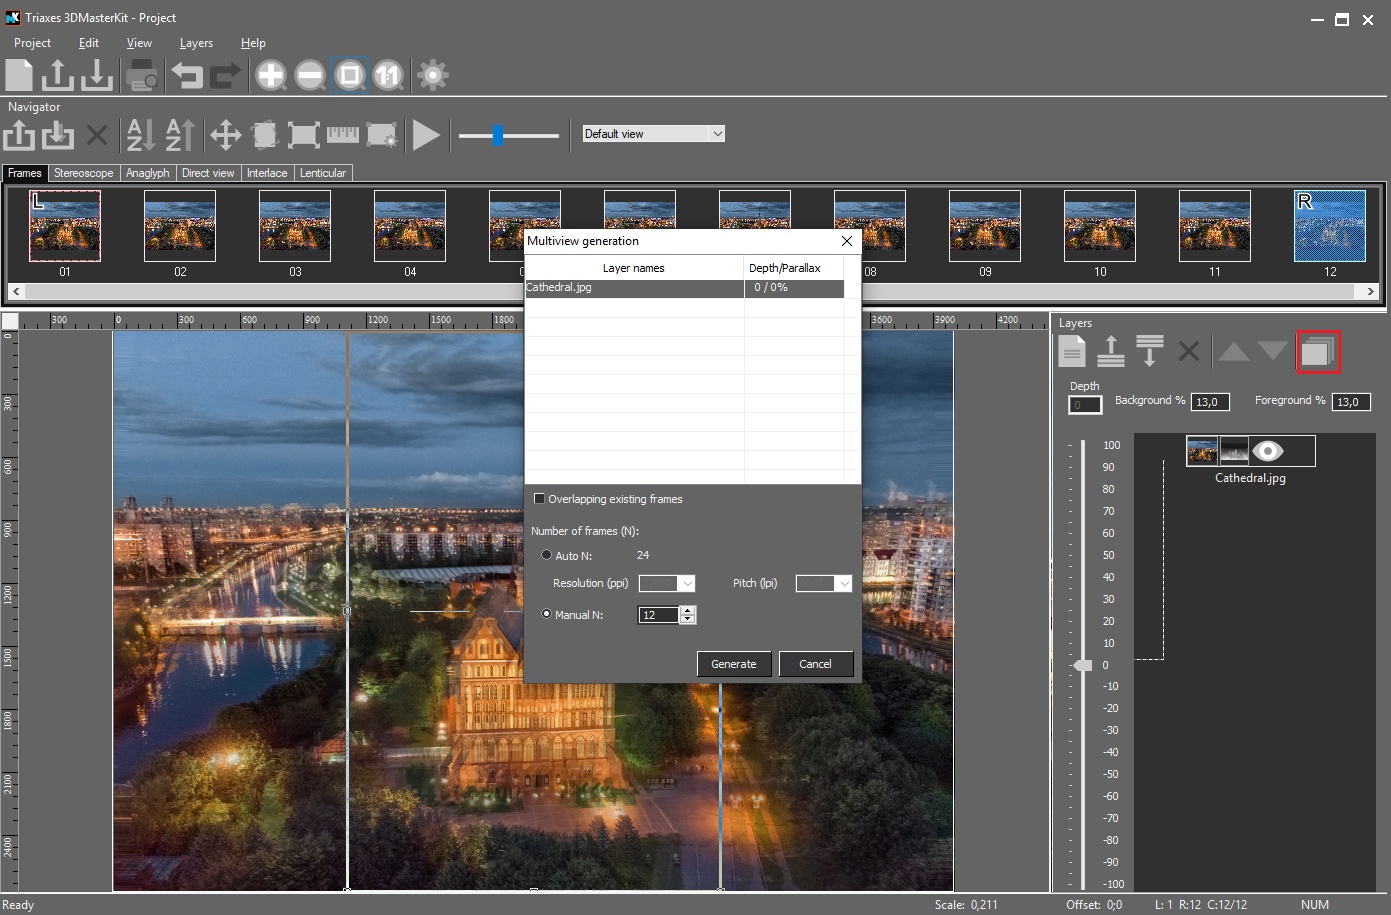
Fig. 4.3.4
To preview the effect it is enough to generate a small number of frames (usually 6-12). You can view the frames in the animation mode and evaluate the 3D effect (View >> Animation, or press either the corresponding button on the tool bar or the Spacebar). Let’s have a closer look at the created frames. The slider on the tool bar allows changing the transparency of frames overlapping each other. By dragging the slider to the far-left you can see the left frame, the far-right position of the slider shows the right frame. The image can be also zoomed in. Sometimes there appear problem areas – these are usually parts of the image where the depth map has sharp transitions. It usually takes place when there are long distances separating foreground and background image objects. It means the software does not have the information about the background objects hidden behind foreground ones. When foreground objects shift, the software completes the image using the information available. If the area to be completed is big, there appear flaws that look like stretches (see fig. 4.3.5).
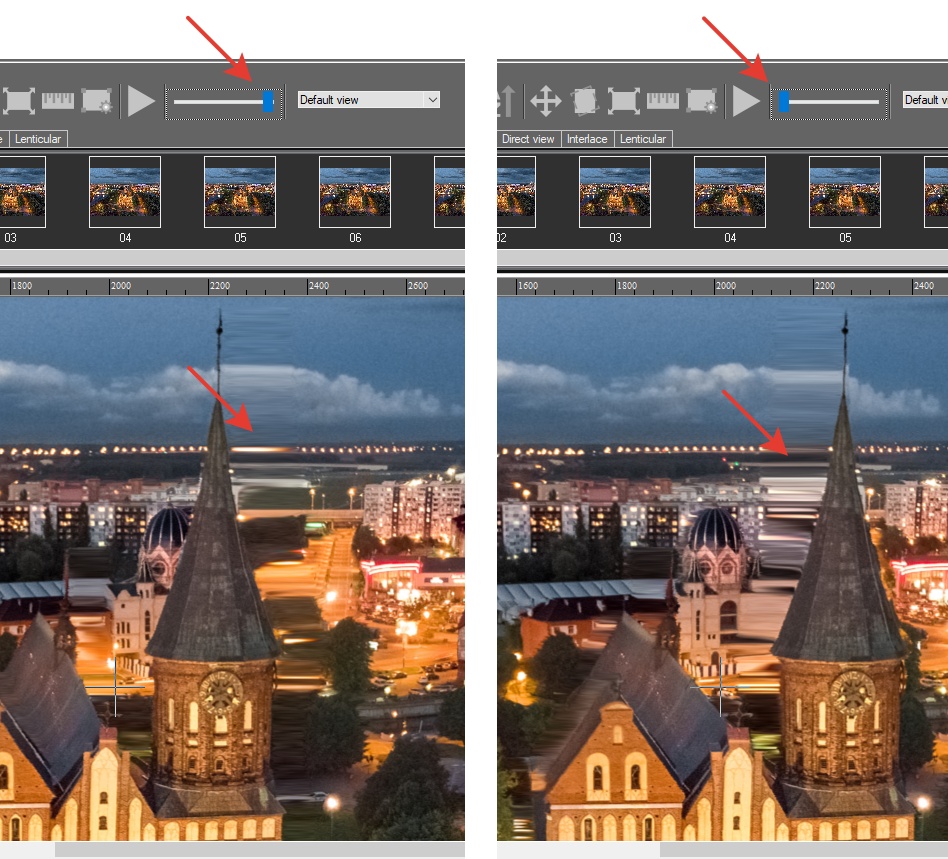
Fig. 4.3.5
This problem can be solved by separating the foreground objects into standalone layers and reconstructing the background objects. You can perform this operation in a graphics editor like Photoshop or GIMP. The image split into layers is saved to the .psd file.
4. Working with layers
Splitting into layers is one of the basic image editing operations, therefore I am not going to go into details here. Let’s focus on the following recommendations only:
- The size of all the layers should be identical to the image size.
Note. When saving the project, Photoshop automatically reduces the layer size by the size of the visible part of the layer. After adding such a layer to 3DMasterKit, the size of the layer can be restored with the help of the Layer to image size context menu command (right-click on the layer icon in the Layers window). - The order of layers must correspond to object distances. The foreground objects belong to the top layer, the background objects – to the bottom one.
- Voids of the bottom layers must be restored as much as possible.
- When separating objects into layers, make object edges a little blurred.
- Use one and the same color model for all the layers: RGB with the alpha channel.
Let’s assume that we have an image already split into 3 layers and saved to Cathedral.psd. Let’s perform the following actions:
- Create a new project in 3DMasterKit.
- Add layers (Cathedral.psd) to the project (Layers >> Add…)
- Place all the layers at level-0 in the Layers panel.
As a result the software main window will look like on a fig. 4.3.6.
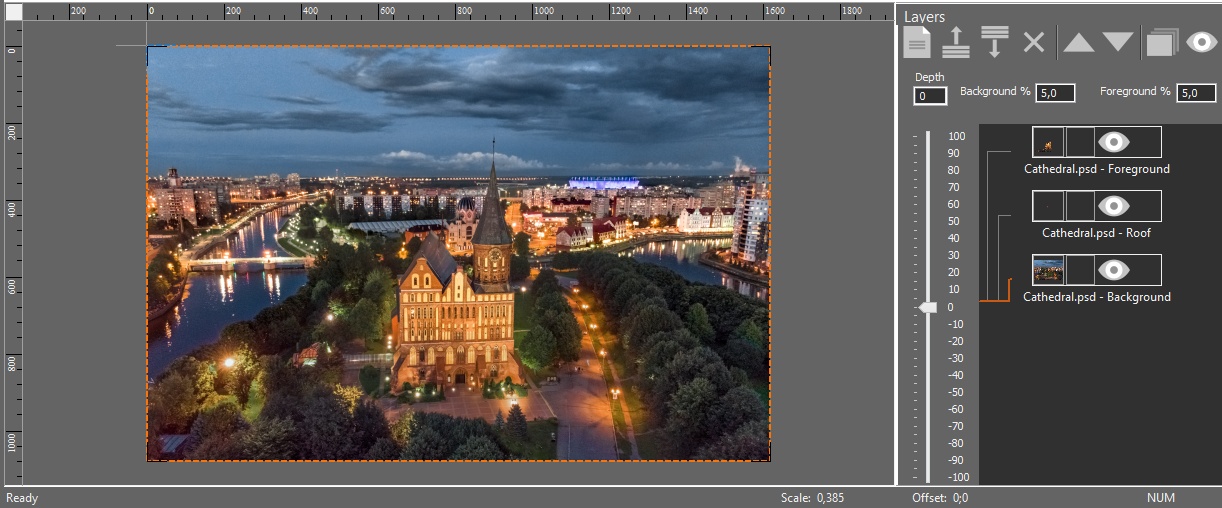
Fig. 4.3.6
5. Depth map for layers
To create a 3D effect we need to add a depth map to the layers. Let’s perform the following actions:
- Add one and the same depth map created earlier for all the layers (choose Load depth map from the context menu).
- Adapt the depth map for each layer. For that go to 3DMasterKit Settings (Project >> Settings... (Ctrl+K)) and specify the path to the external graphics editor that will be used for image correction (see fig. 4.3.7).
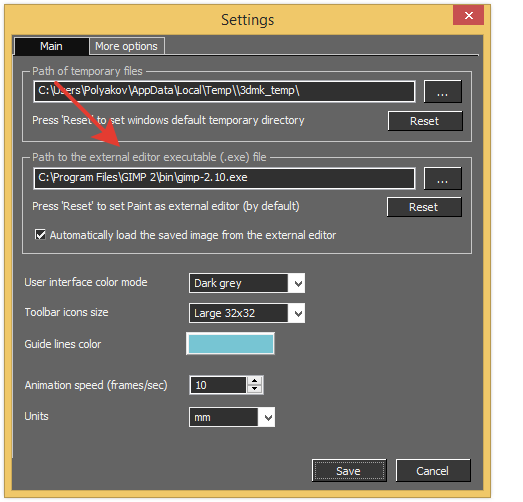
Fig. 4.3.7
- Choose Edit in external editor from the context menu and open the image for editing (see fig. 4.3.8).
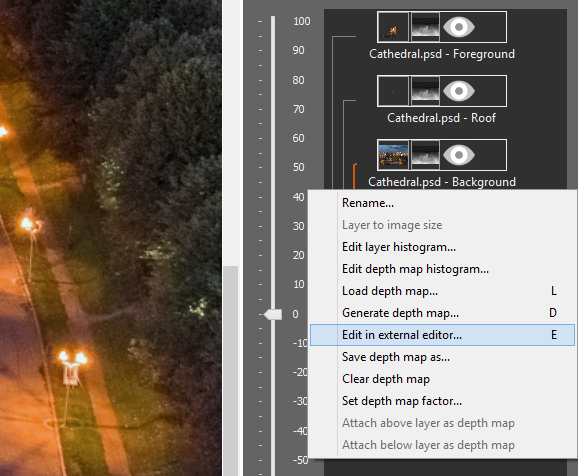
Fig. 4.3.8
- The editor will open 2 layers: the original layer image and a depth map in a separate layer. At this stage the task is to conform the layer depth map to the layer image. Use graphic tools of the editor to edit the depth map. To export changes to 3DMasterKit save (overwrite) the file. You can also change the layer image. Such changes will be also exported to 3DMasterKit.
Note. 3DMasterKit uses temporary files when connecting with external editors. To transfer changes to 3DMasterKit you need to save them to the same file. When doing that do not change the location of the file, image size, as well as names and order of layers. If something went wrong and due to some reason the connection between programs was broken, you can save the changes performed in the editor as a .psd file under any name and to any location, and then add the edited project to 3DMasterKit (Layer >> Add…).
For example, we removed the cathedral image from the background layer. Consequently it must be removed from the depth map. You should get something like this (see fig. 4.3.9).
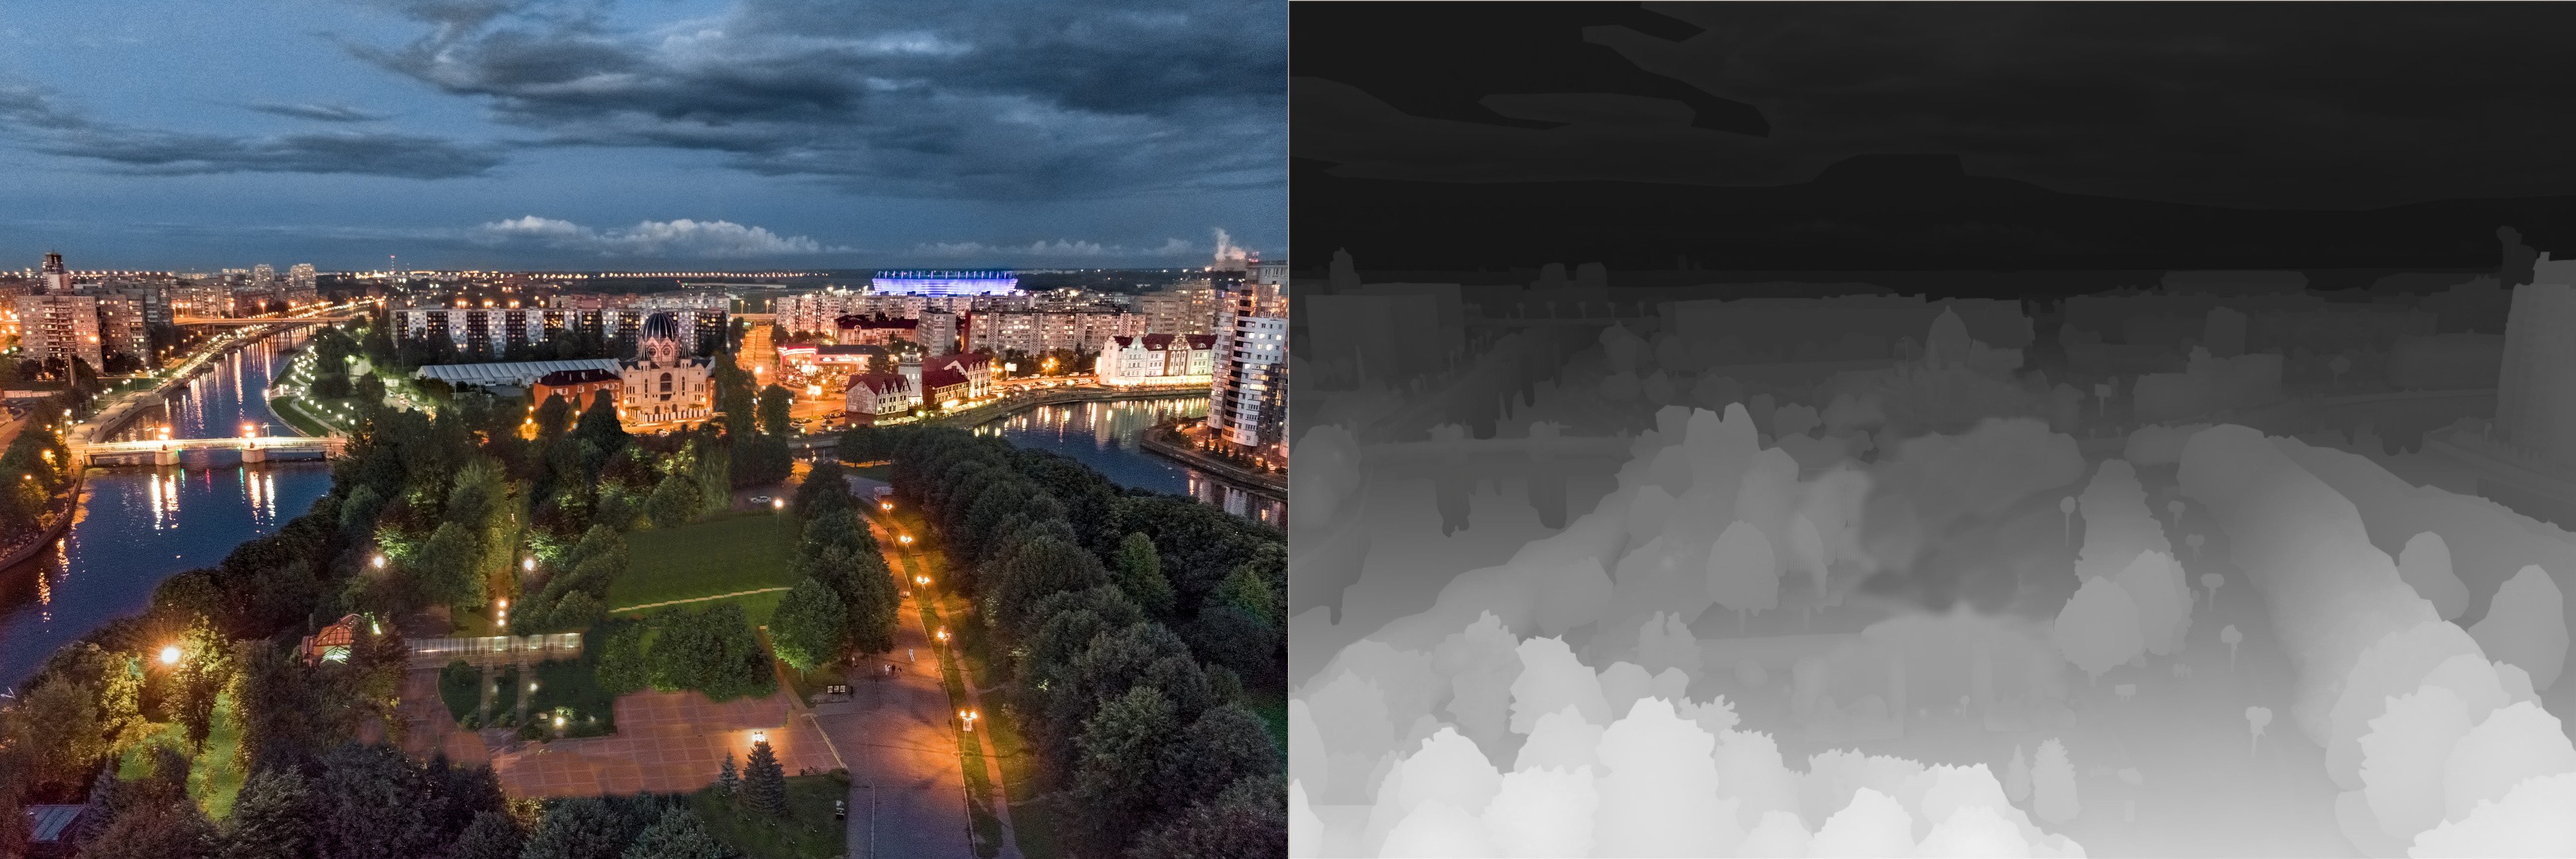
Fig. 4.3.9
- Perform steps 3,4 for all the layers.
At this stage we save the project with all the layers and depth maps to a .psdd file (Layers >> Save template…). Then we can copy this file and open it again in 3DMasterKit or Legend (Layers >> Add…).
Note. The PSDD format was developed by Triaxes based on the PSD format. PSDD allows saving layers and depth maps associated with them, as well as the order of layers and parallax settings. If necessary, you can open the file in Photoshop or GIMP and change the file extension to .psd. It will be possible to open such a file – layers and depth maps will be visible, but you will lose settings and connection between layers and depth maps.
6. Frame series generation
To generate a series of frames we set the required parallax values and go to Layers >> Generate multiview…
The software offers the recommended number of frames depending on the expected lenticular image resolution and LPI of the lens (see fig. 4.3.10).
The generated frames will be shown as a list at the top of the software interface.
You can evaluate the 3D effect with the help of the animation mode (View >> Animation (Spacebar)).
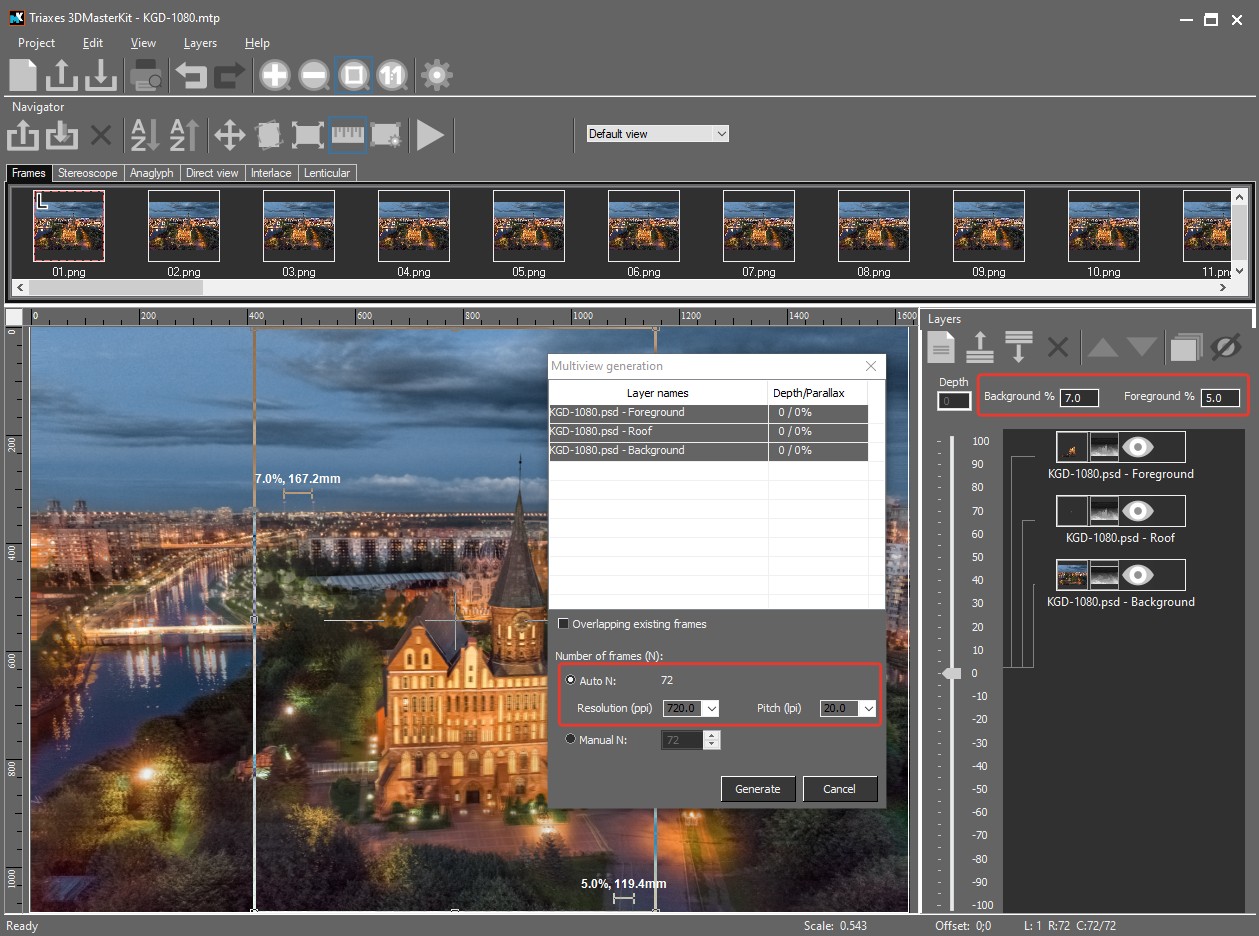
Fig. 4.3.10
7. Saving results
The software allows saving results in the following formats:
Project layers |
Layer >Save template… |
.psdd |
Resulting frames |
Project > Export frames… |
.jpg, .tif, .gif, .mp4, etc. |
Project |
Project > Save |
.mtp and project files |
3D image in the Lenticular tab |
If the encoded image is shown on the screen: Project-Save image… Or Lenticular – Generate-To file… in the Lenticular tab, when encoding images of more than 2Gb. |
.tif, .psd, .psb |
8. Files from this example
Location:
C:\Program Files\Triaxes\3DMasterKit 10.0\Samples\2D3DСonversion
File name |
Description |
Cathedral.jpg |
Source image |
Cathedral-depth.jpg |
Depth map |
Cathedral.psd |
Source image split into layers. |
KGD.psdd |
Project (layers and depth maps) |
Web reference to the article: https://triaxes.com/articles/2d-3d-conversion/