2.12 Program settings
Click on button  or use Ctrl+K shortcut to open Settings dialog (See Fig. 2.12.1).
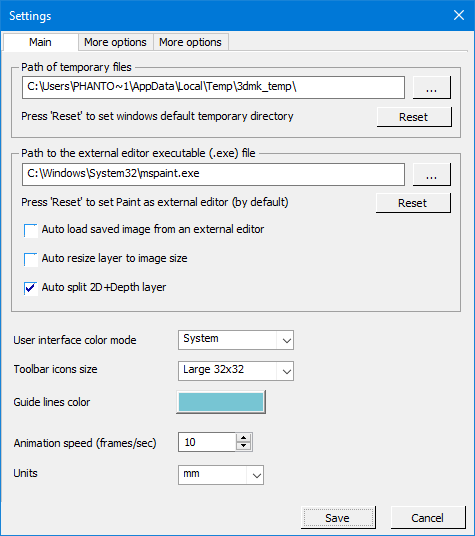
Fig. 2.12.1. Program settings
Main tab
The path of temporary files - the folder where temporary files are stored. You can reset it to the default Windows path. It is recommended to create this folder on a SSD disk;
The path to the executable file (exe) of the external editor - location of the external graphics editor that is used when a template layer is edited (GIMP is recommended). You can reset it to the standard Windows editor - Paint;
If you do not want to see the confirmation dialog after the image was edited and saved in the external editor - use the option "Automatically to load the saved image from the external editor";
Auto resize layer to image size - sets layers size not smaller than project canvas size. This option works when adding layers to the project or opening templates (.psdd). It is recommended to switch ON this option when working with Adobe Photoshop as an external editor.
User interface color mode - an option to select the light “system” or “dark gray” interface color theme;
Toolbar icons size - auto-size, small (16x16 pixels) or large (32x32 pixels) sizes for all toolbars;
Guide lines color - the color of the helplines on the ruler;
Animation speed - frames playback speed on working area (changing frames per second);
Units - measurement units: millimeters or inches.
Note. This option is applied for all the software and will be saved until the next adjustment. If you change the measurement units while a lenticular or any other image is being prepared, the set-up parameters (width, height, etc.) will be automatically converted into the chosen measurement system.
More options
There are checkboxes to show confirmation messages.
Setting up the depth map generation module
The distribution package of the Legend program version 11 includes a module for generating a depth map from a single 2D image, as well as a module based on a neural network with the MiDaS algorithm, which is located by default in the models directory. If problems arise with the operation of the MiDaS module, you can select a different location in the Path to the MiDaS module configuration file field (see Figure 2.12.2), having previously placed the module files in this location.
Note. The path to the module files (midasnet.xml and midasnet.bin) must be specified in the program settings, and must also contain only English characters.
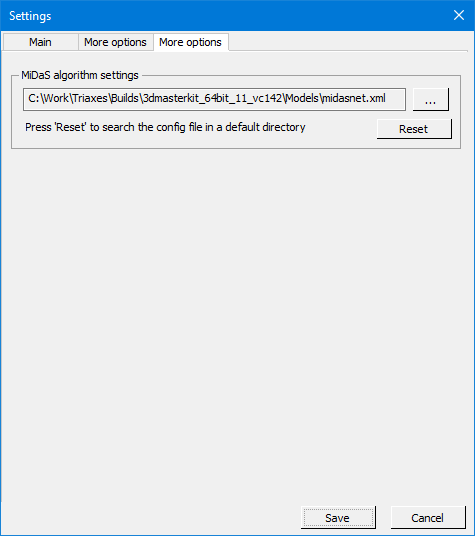
Fig. 2.12.2 Depth plugin settings dialog