2.10 Generating an image for viewing via lenticular lens
Triaxes Legend can work with image files in the CMYK color model mode. This color model is designed and used for printing images. When working with CMYK images, image generation to a file (Adobe Photoshop Document .psd /.psb file format) is the only option available (Figure 2.13).
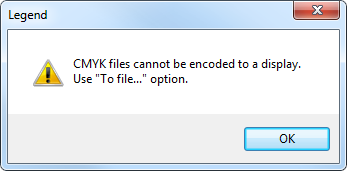
Fig. 2.13. CMYK-file message box
Two output options are possible: to encode the image for display (To display… button) or to encode it to a file (To file… button). The available saving formats are .psd and .bmp (.psd is specified by default).

Fig. 2.14. Generate buttons of the Lenticular tab
If the image is spitted then it is possible to encode it part by part or encode it as a whole.
To encode the image for display press To display… – Select part to encode dialog appears.
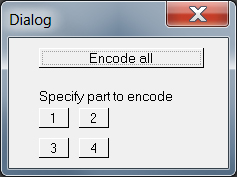
Fig. 2.15. Select part to encode dialog (to display)
To encode the whole image press Encode all.
To encode a part press the button with the part number.
The numbers of the encoded parts are marked with the blue color.
To encode an image to a file press To file… – Select part to encode dialog appears.
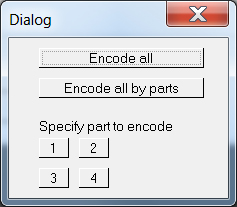
Fig. 2.16. Partitioning to file dialog
To encode the whole image to a file press Encode all.
To encode all parts one by one to a file press Encode all by parts.
To encode one part to a file press the button with the part number.
The numbers of the encoded parts are marked with the blue color.
The Image export dialog is shown in Fig. 2.17. You can choose the type of the created file on the drop-down list in the bottom (.bmp, .jpg – to create a series of pictures;.gif, .avi - to create an animation file).
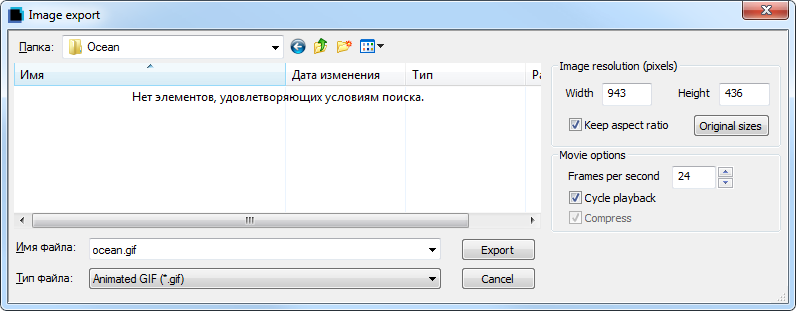
Fig. 2.17. Image export dialog